


Guides
1. Full Overview
Applicable Platforms: Shopify | WordPress | Framer This guide will help you quickly integrate 3Chat AI customer service into your e-commerce website, allowing customers to initiate inquiries through the chat window, thus increasing conversion rates and customer satisfaction.
If you are not yet a user of 3Chat, please visit 3Chat to create an account, and you will receive a 7-day free trial benefit. If, during the trial period, you become particularly interested in our features, after subscribing to the Growth Plan package, you will receive the best functional experience.
2. Shopify
2.1 Preparations Before Installation
Before you begin, please ensure:
✅ You are logged into Shopify and have an operational store website
✅ Ensure one Shopify is only connected to one 3Chat space
2.2 Steps to Operate
Get the installation code for the instant chat window
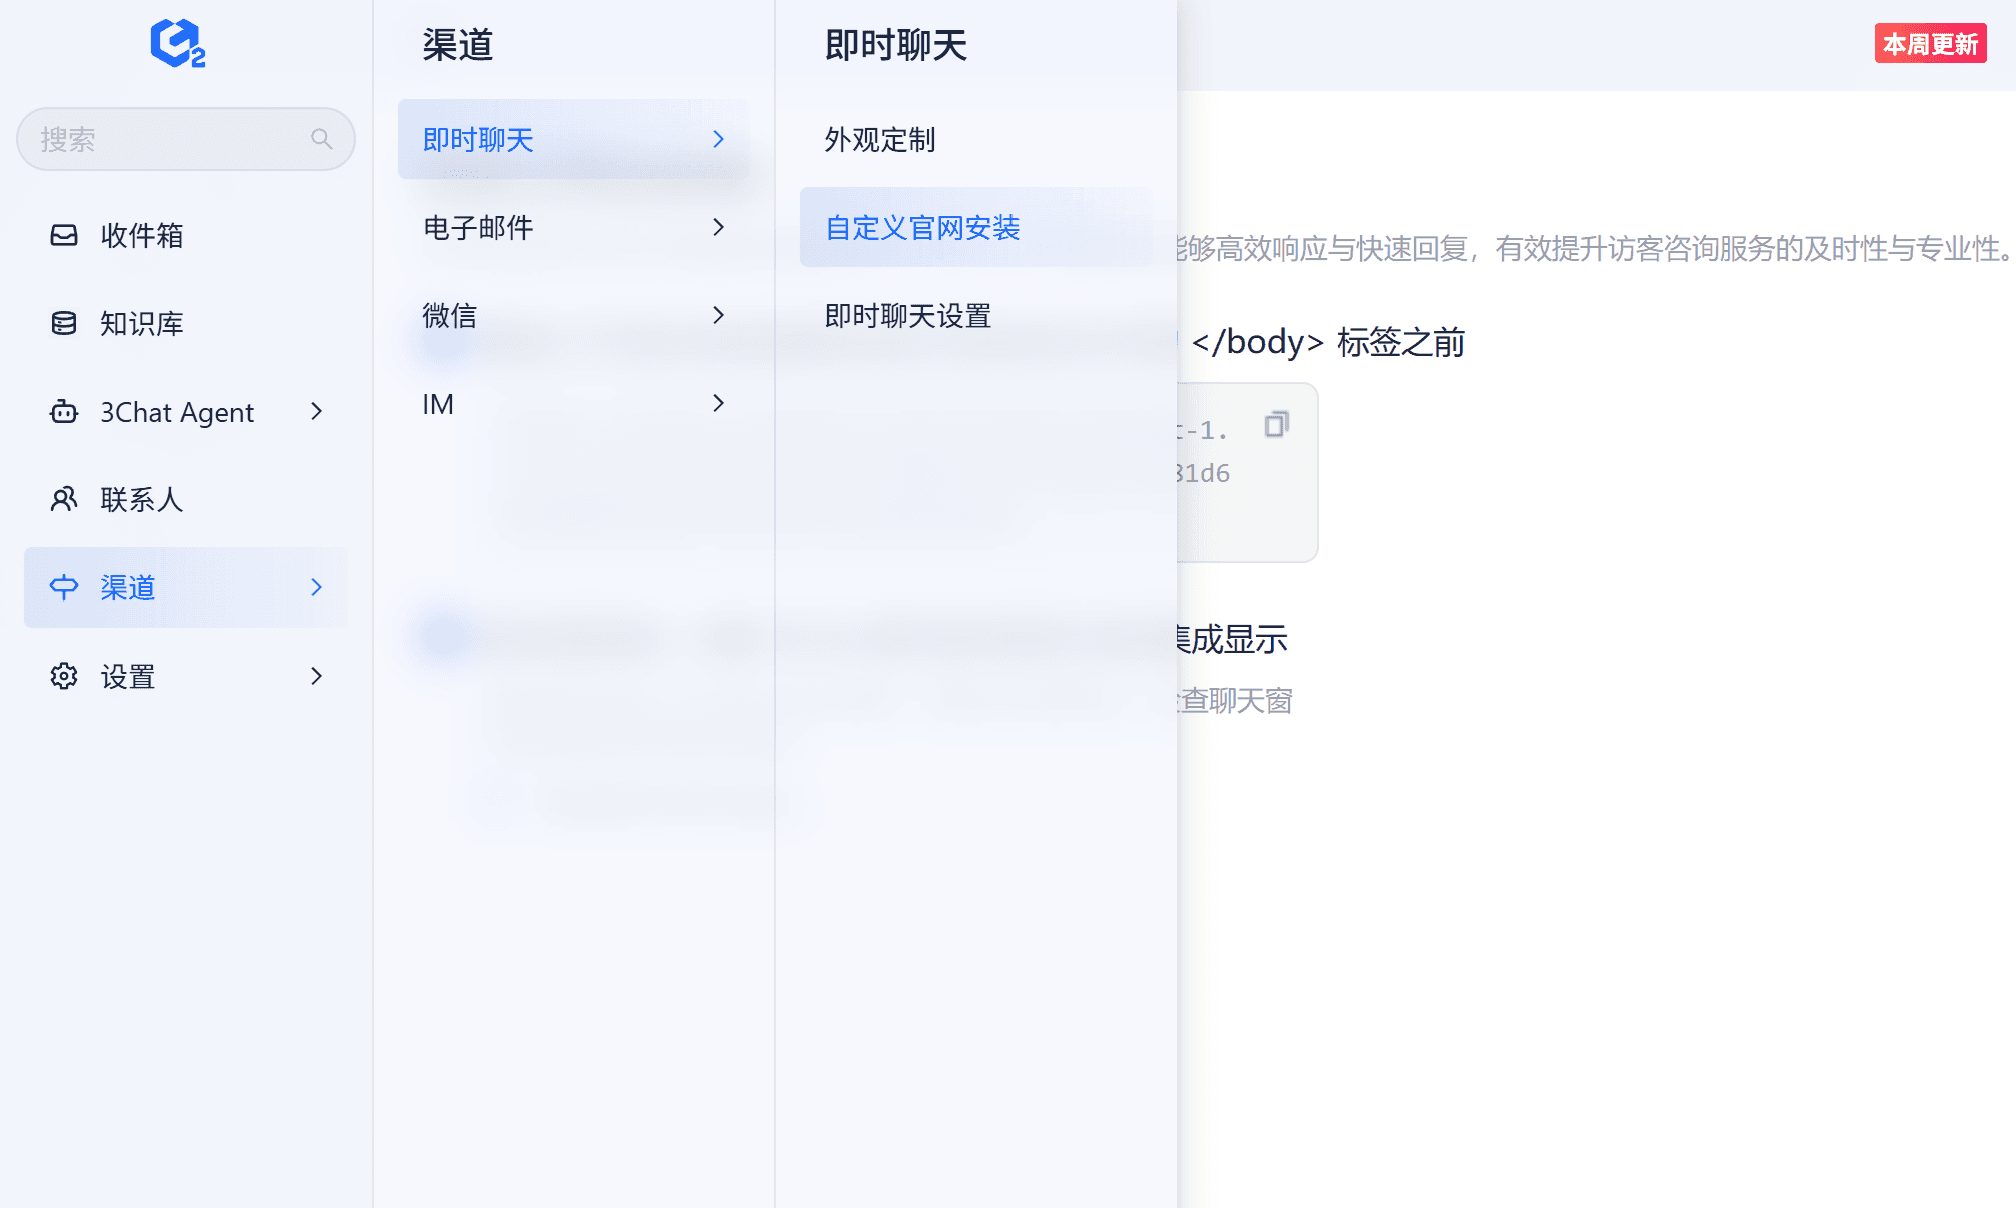
Log into the 3Chat backend, and in the left navigation bar, click 【Channels】→ 【Instant Chat】→ 【Custom Official Website Installation】
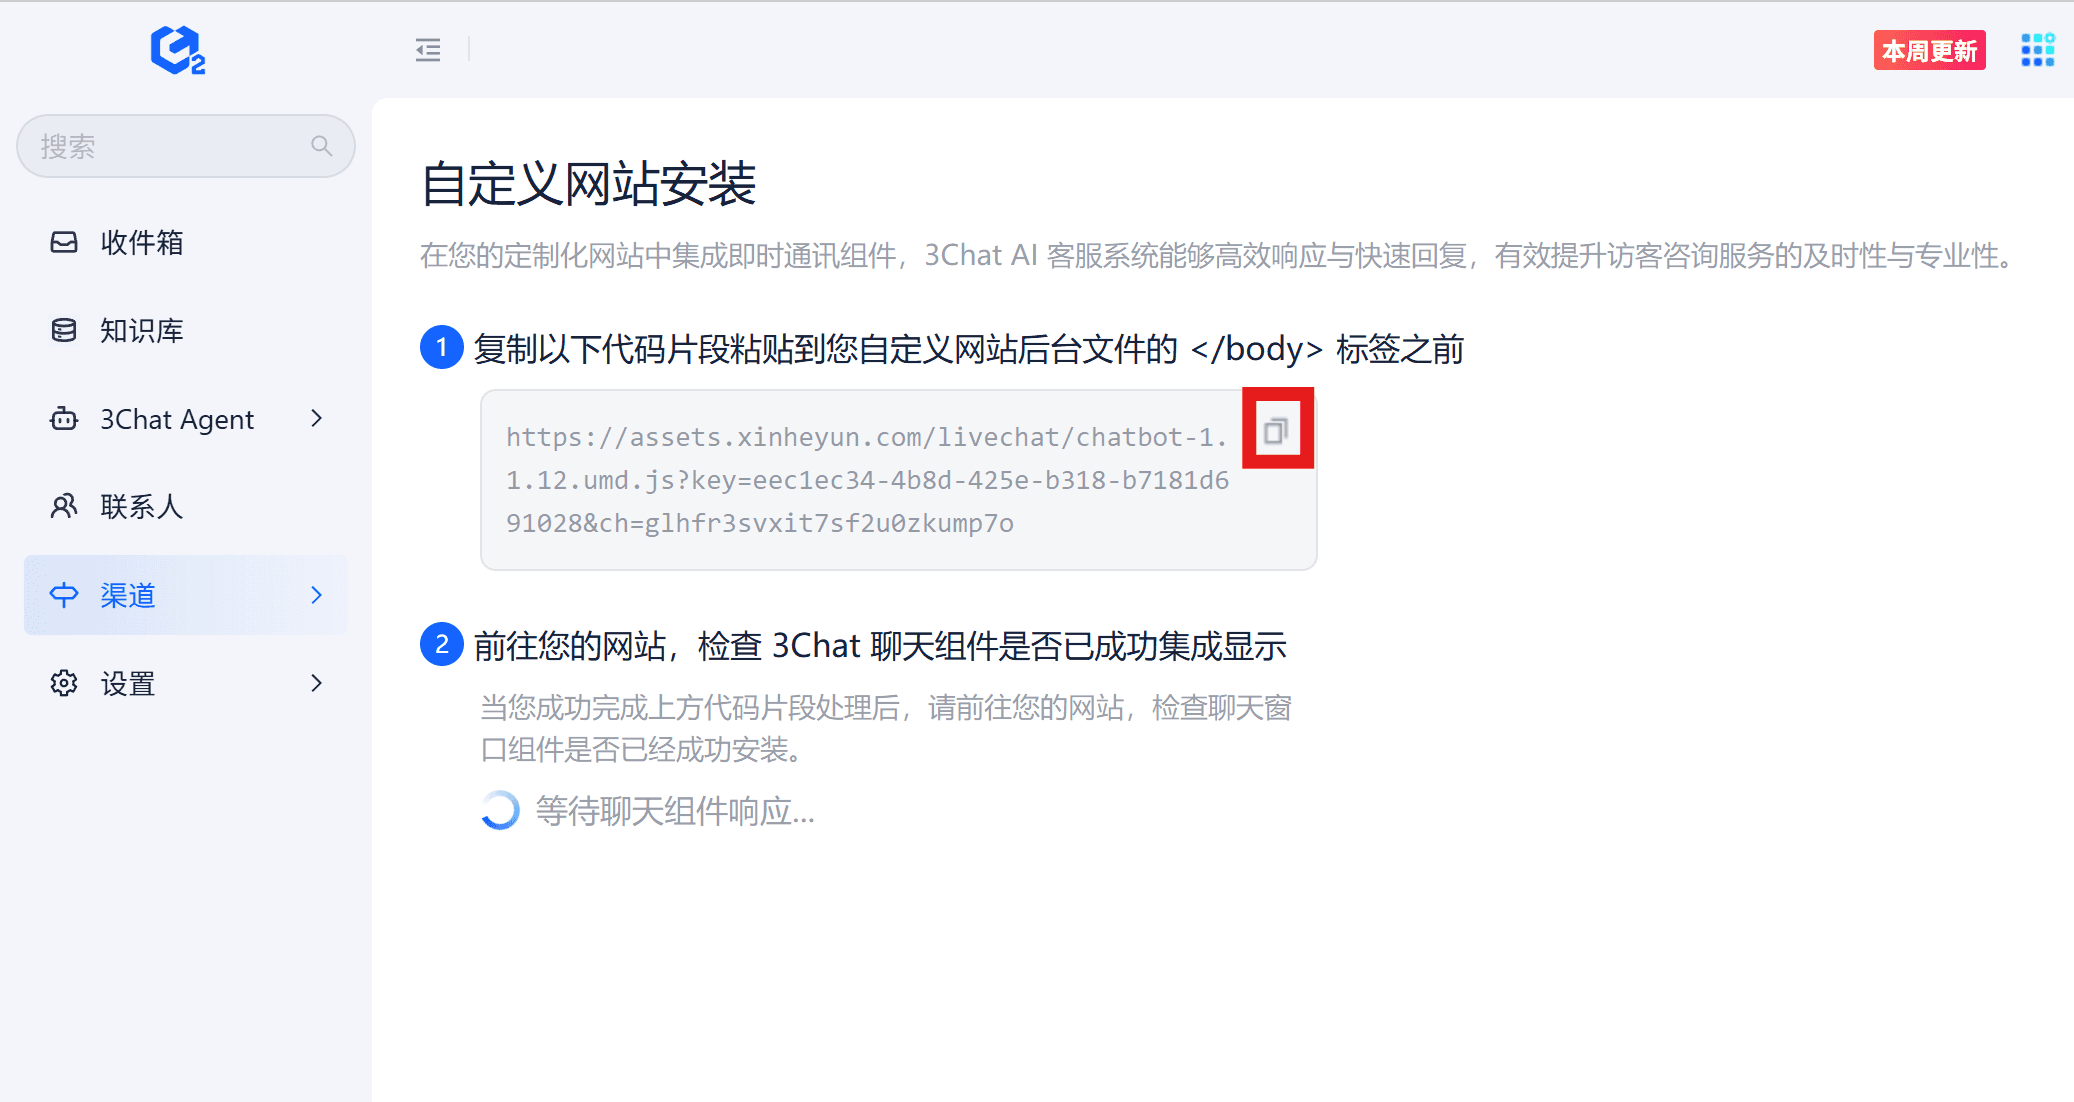
Click Copy Code Snippet
Enter the Shopify code editor and import the 3Chat code
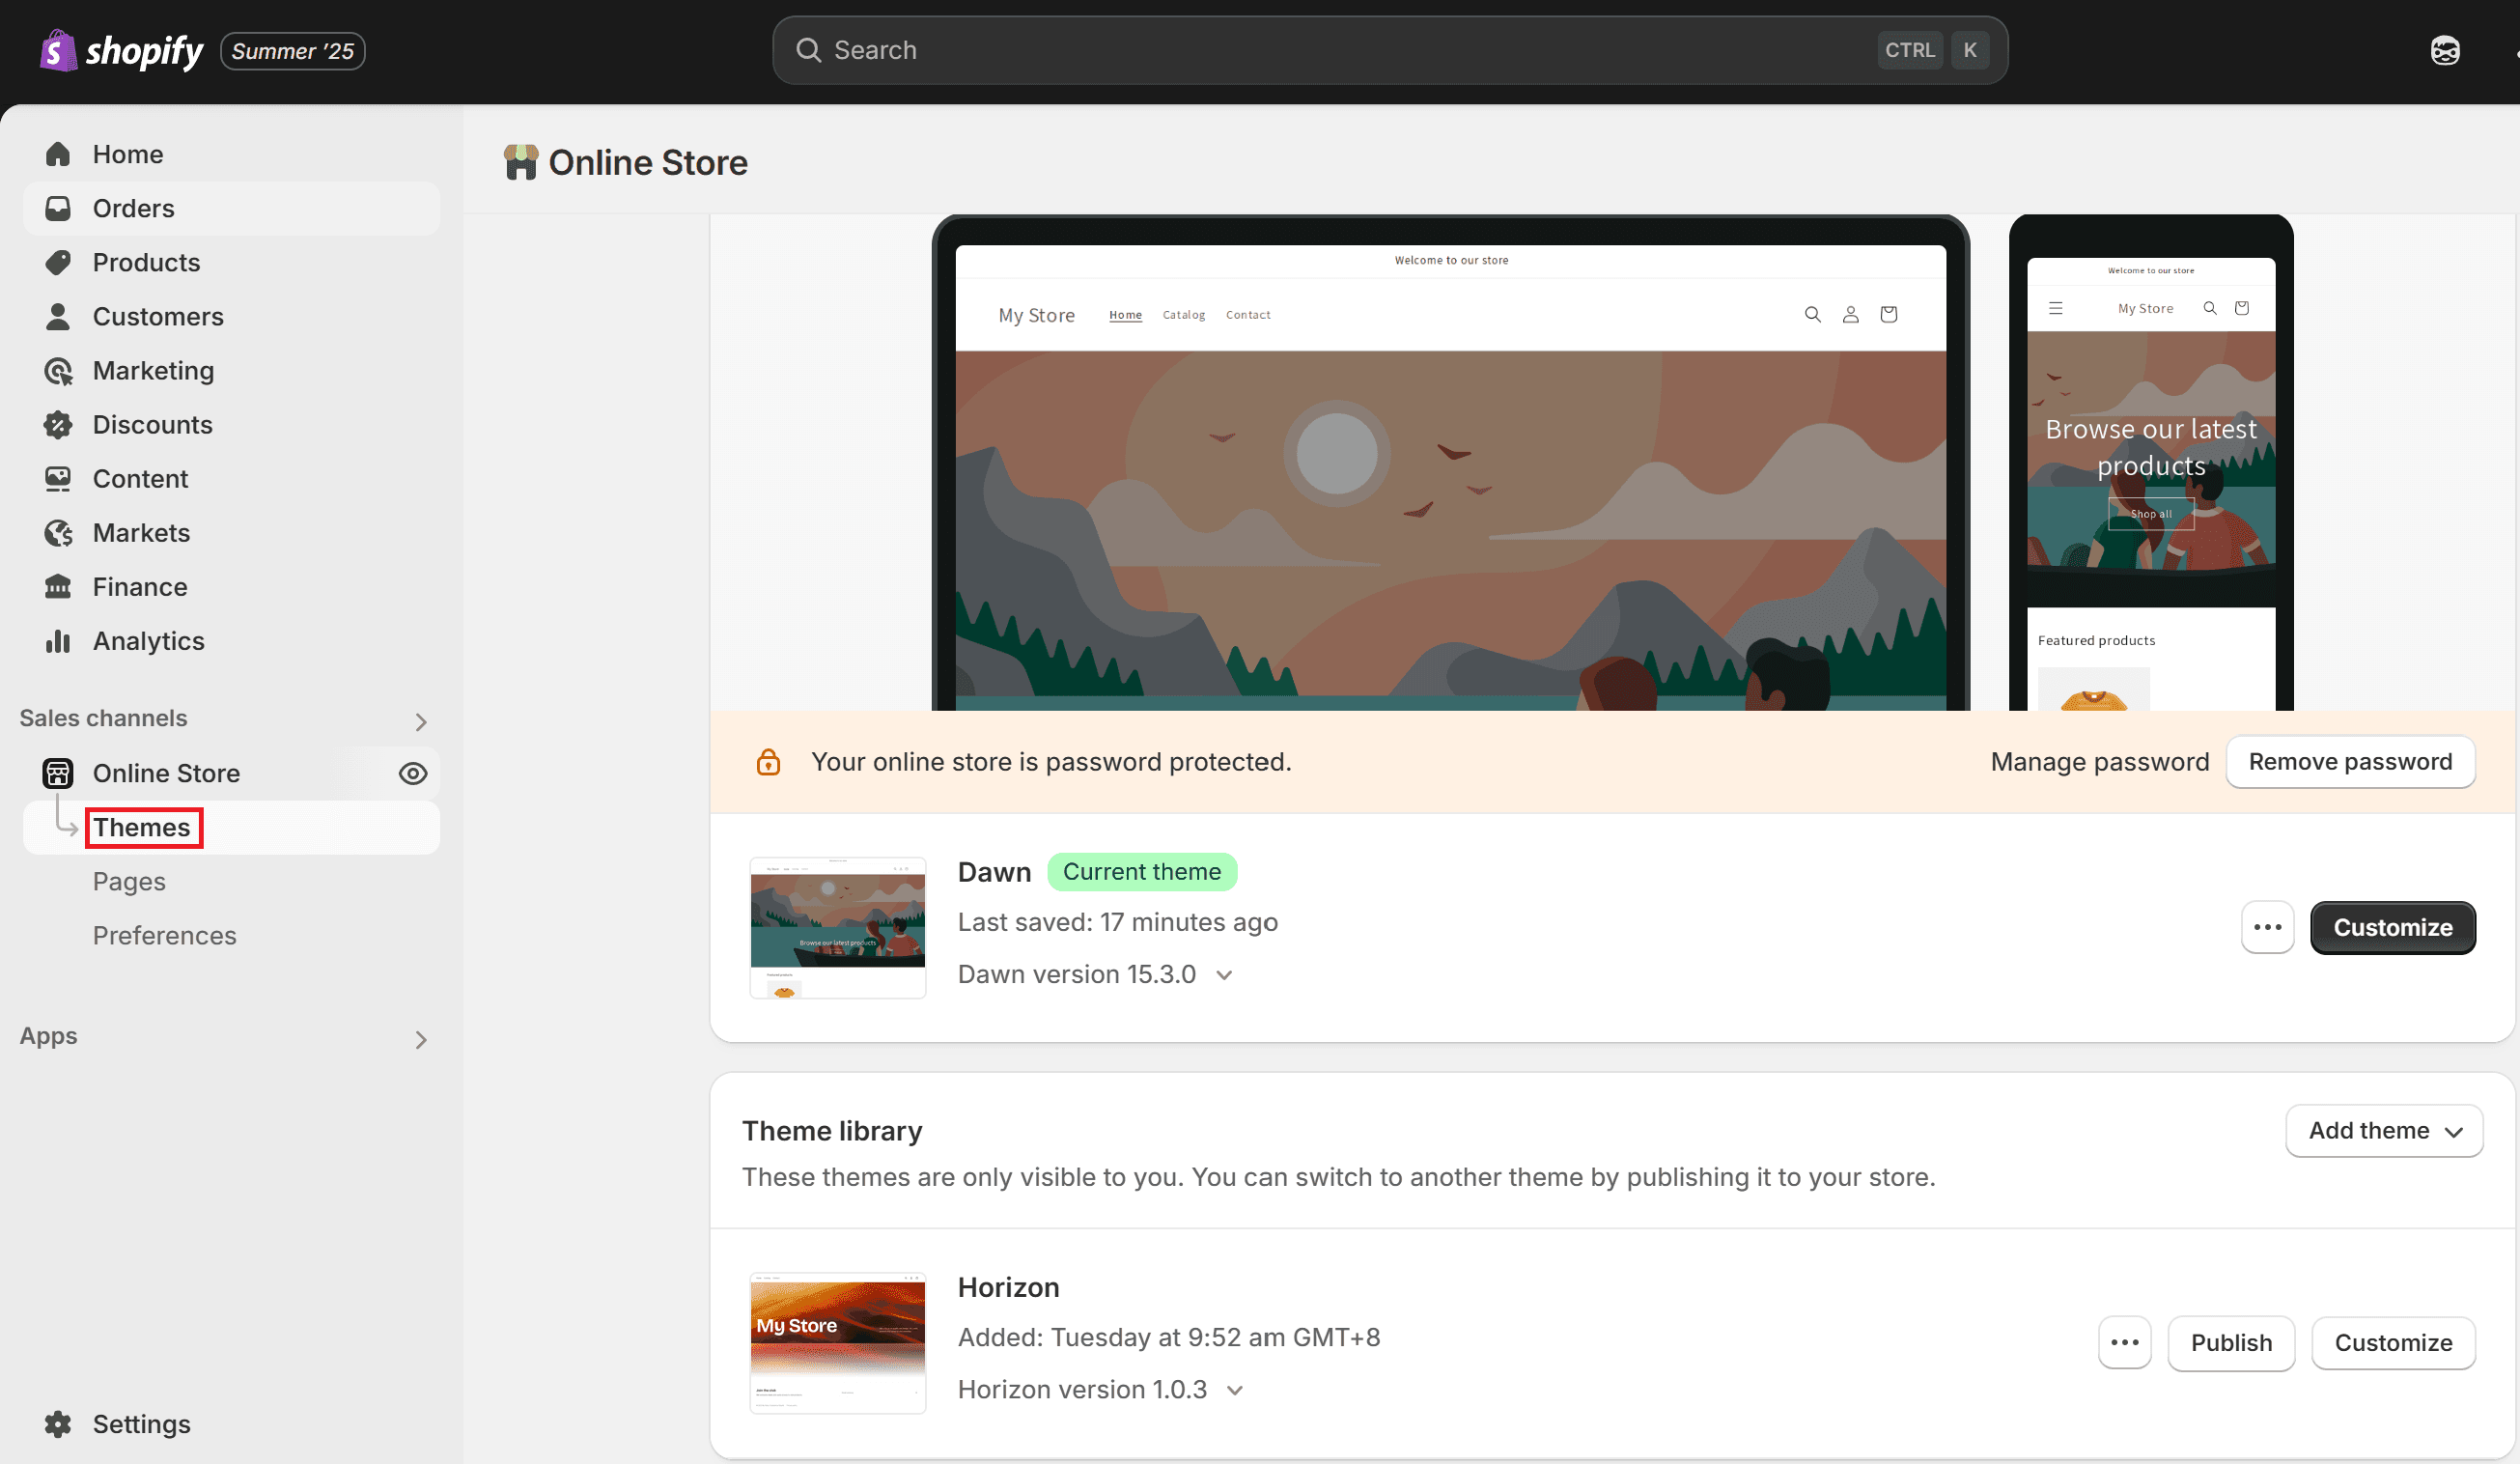
Go to the Shopify backend
Click 【Online Store (Themes)】
Click the 【Action Icon】 on the left of the current theme
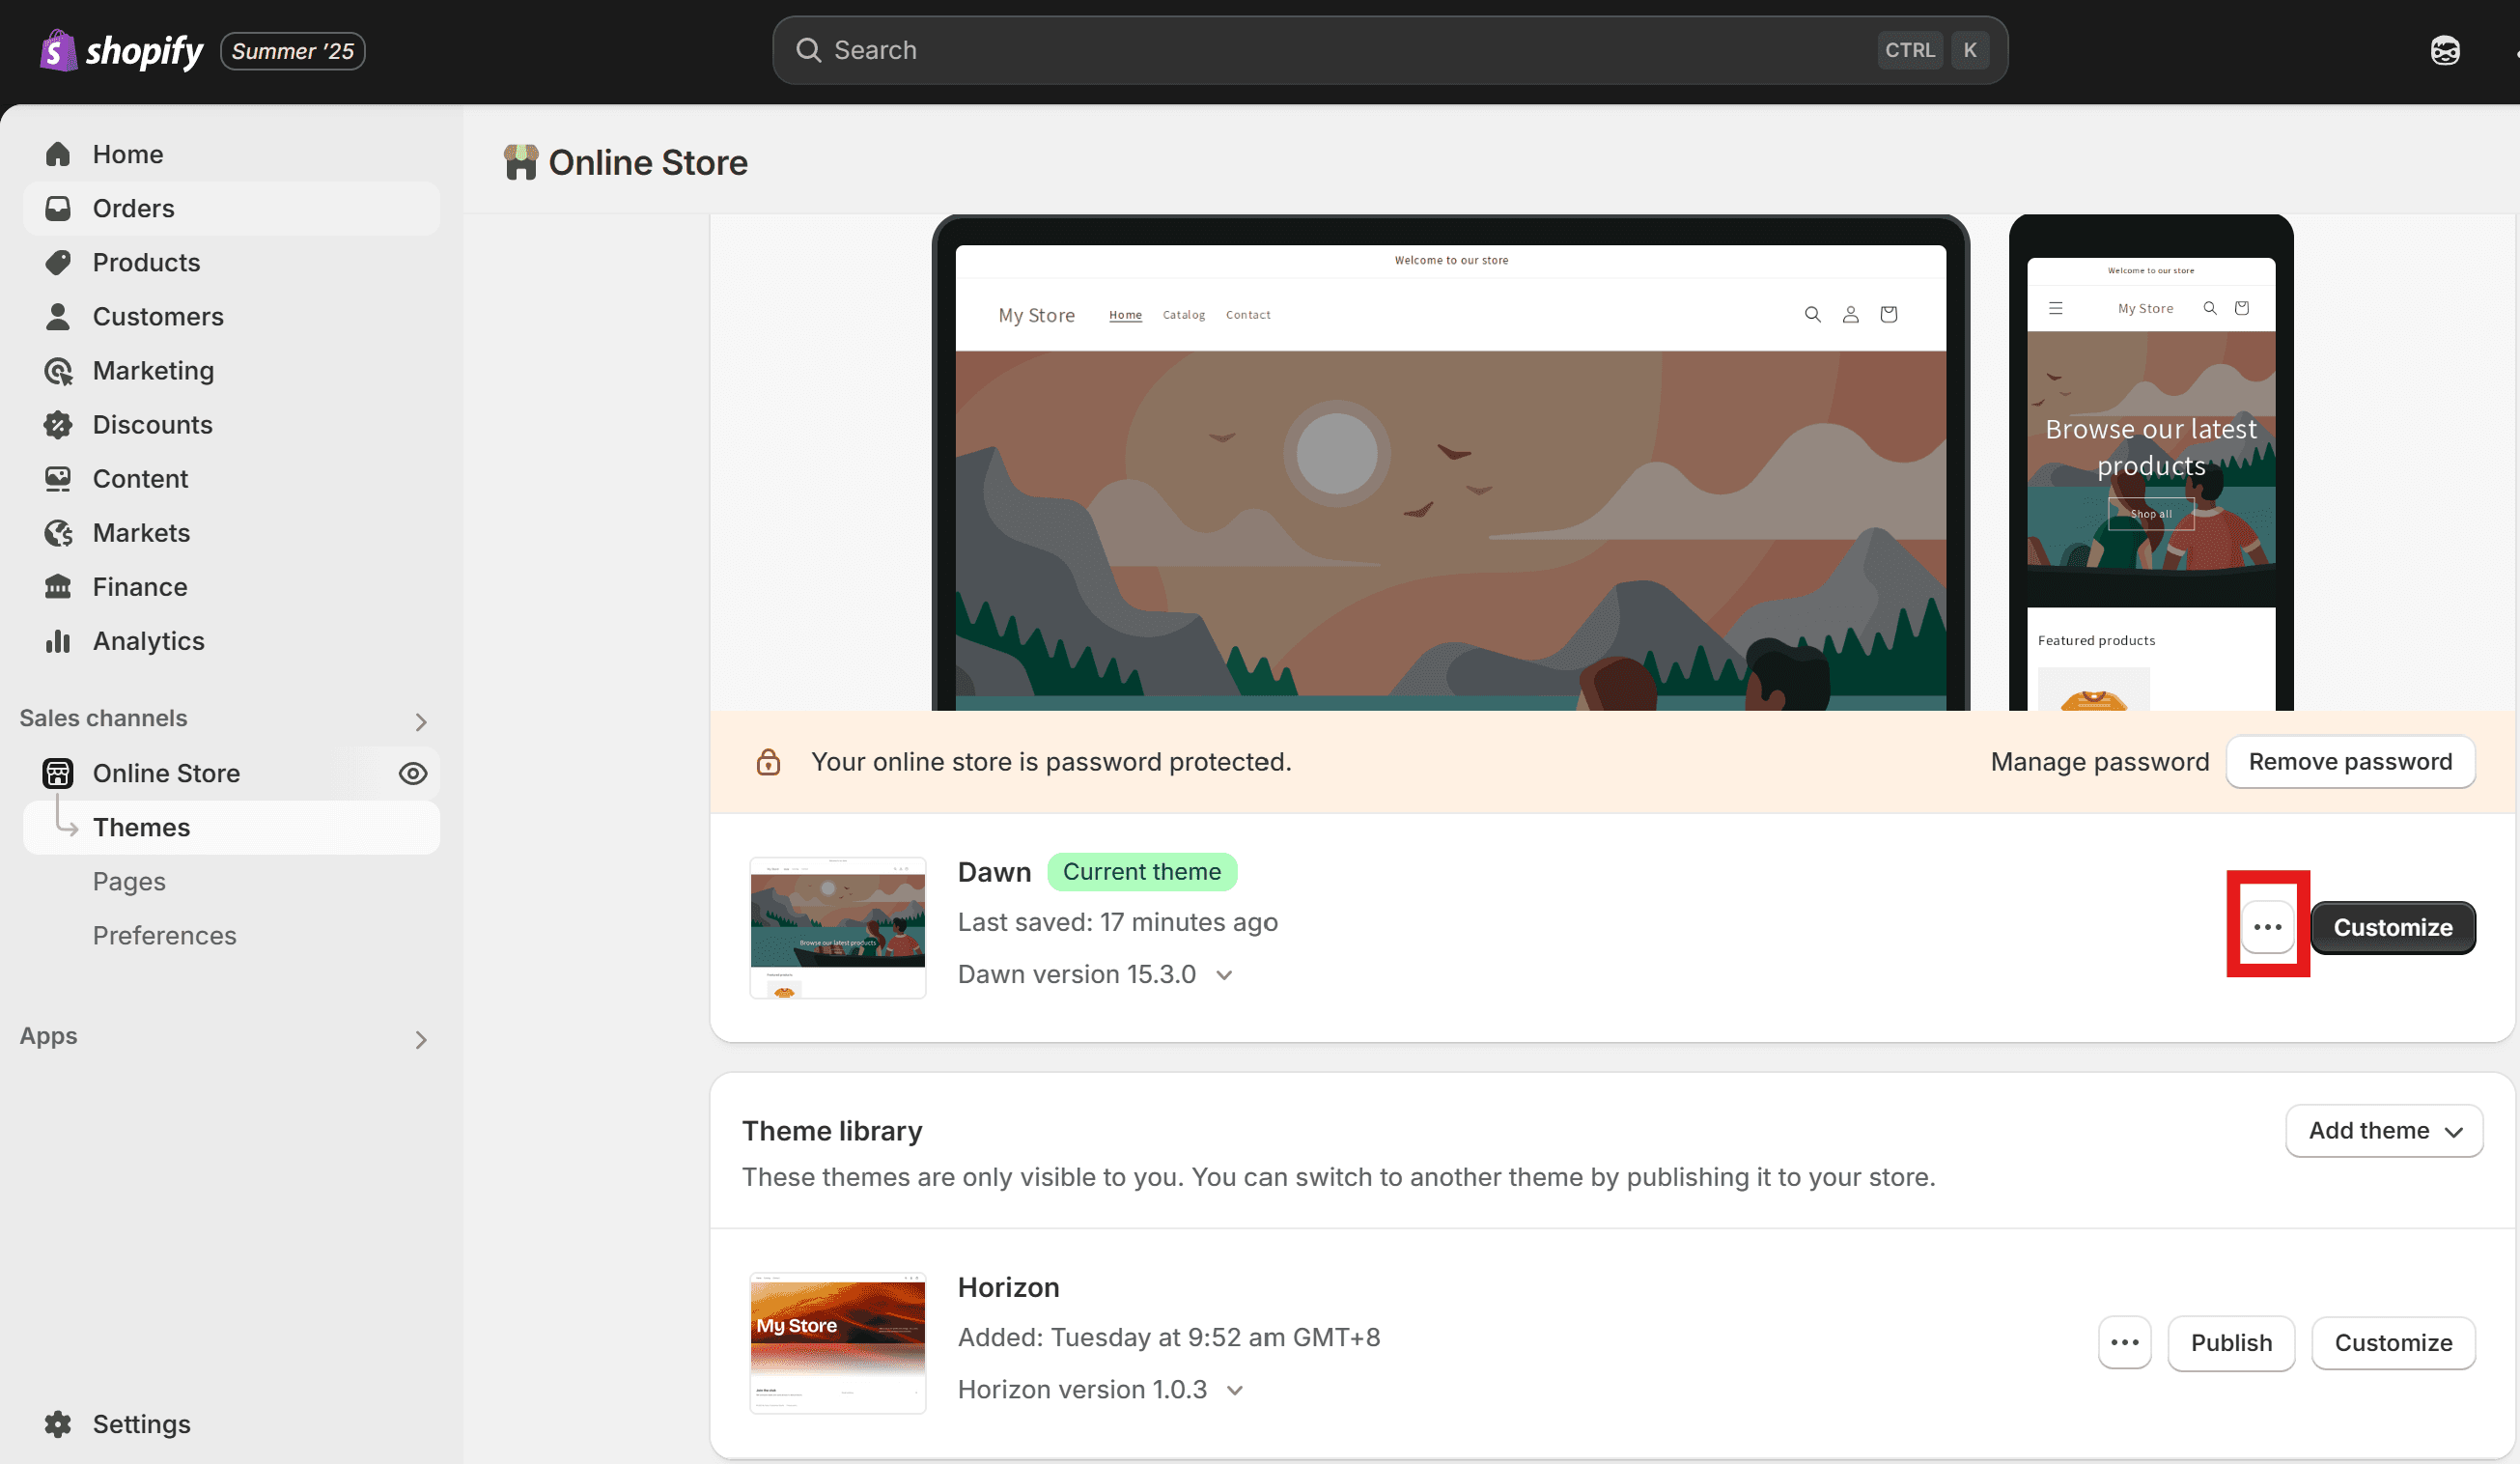
Click 【Edit Code】.

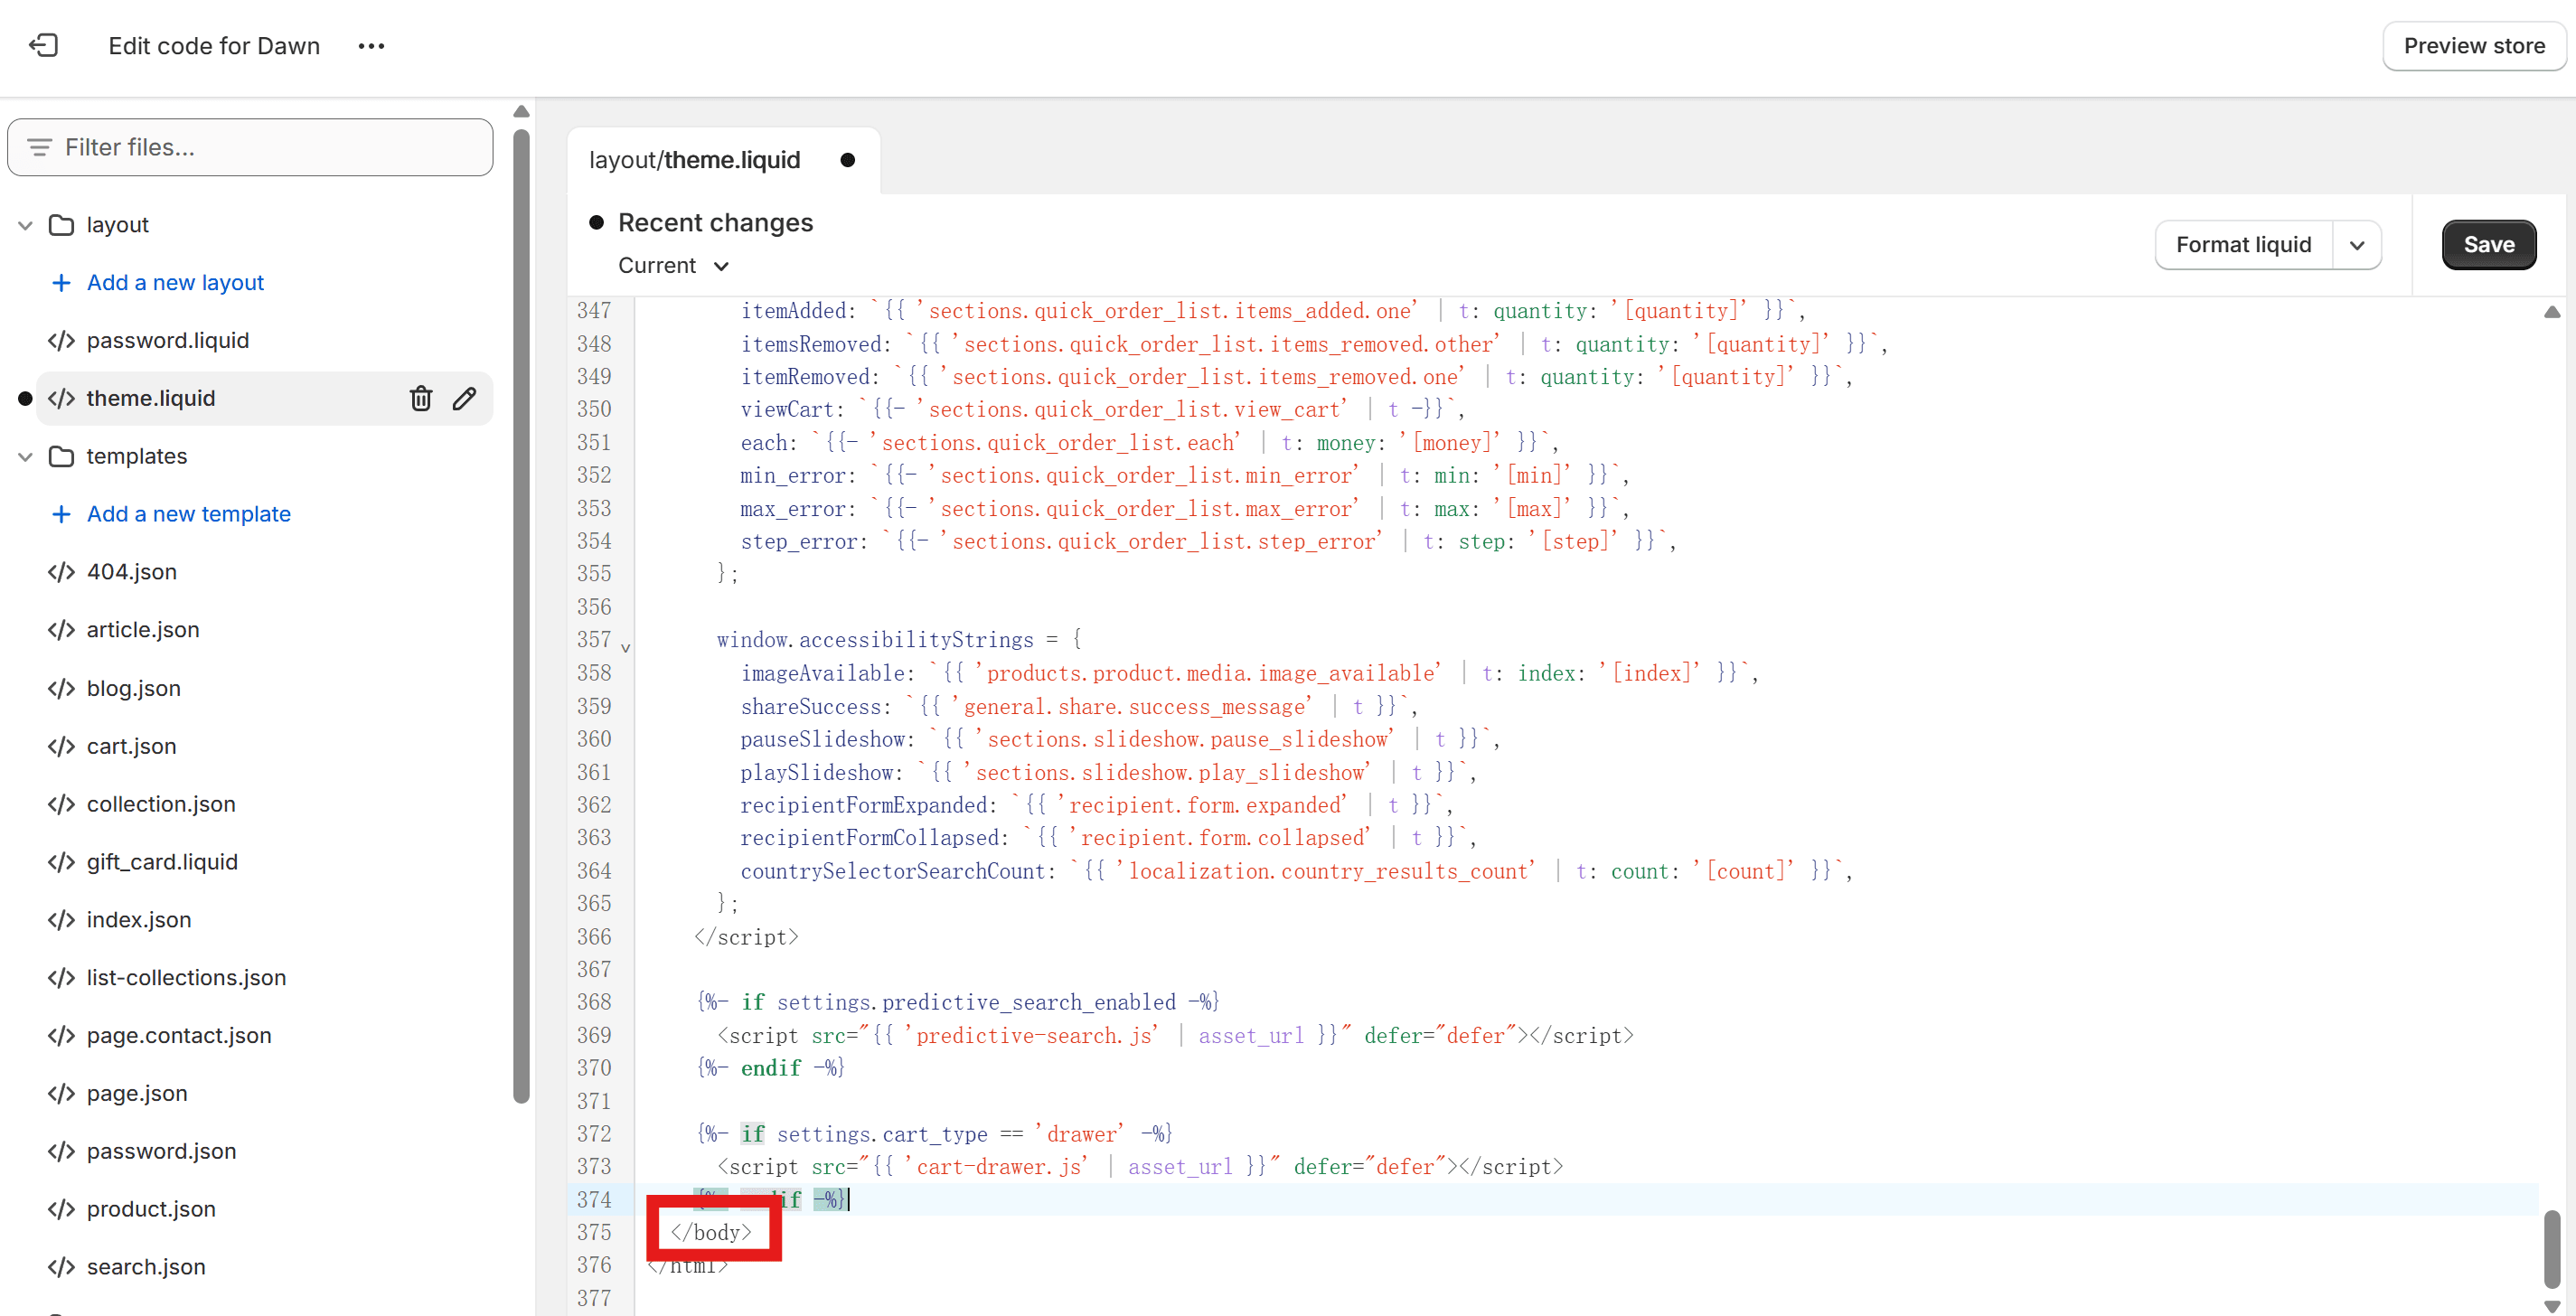
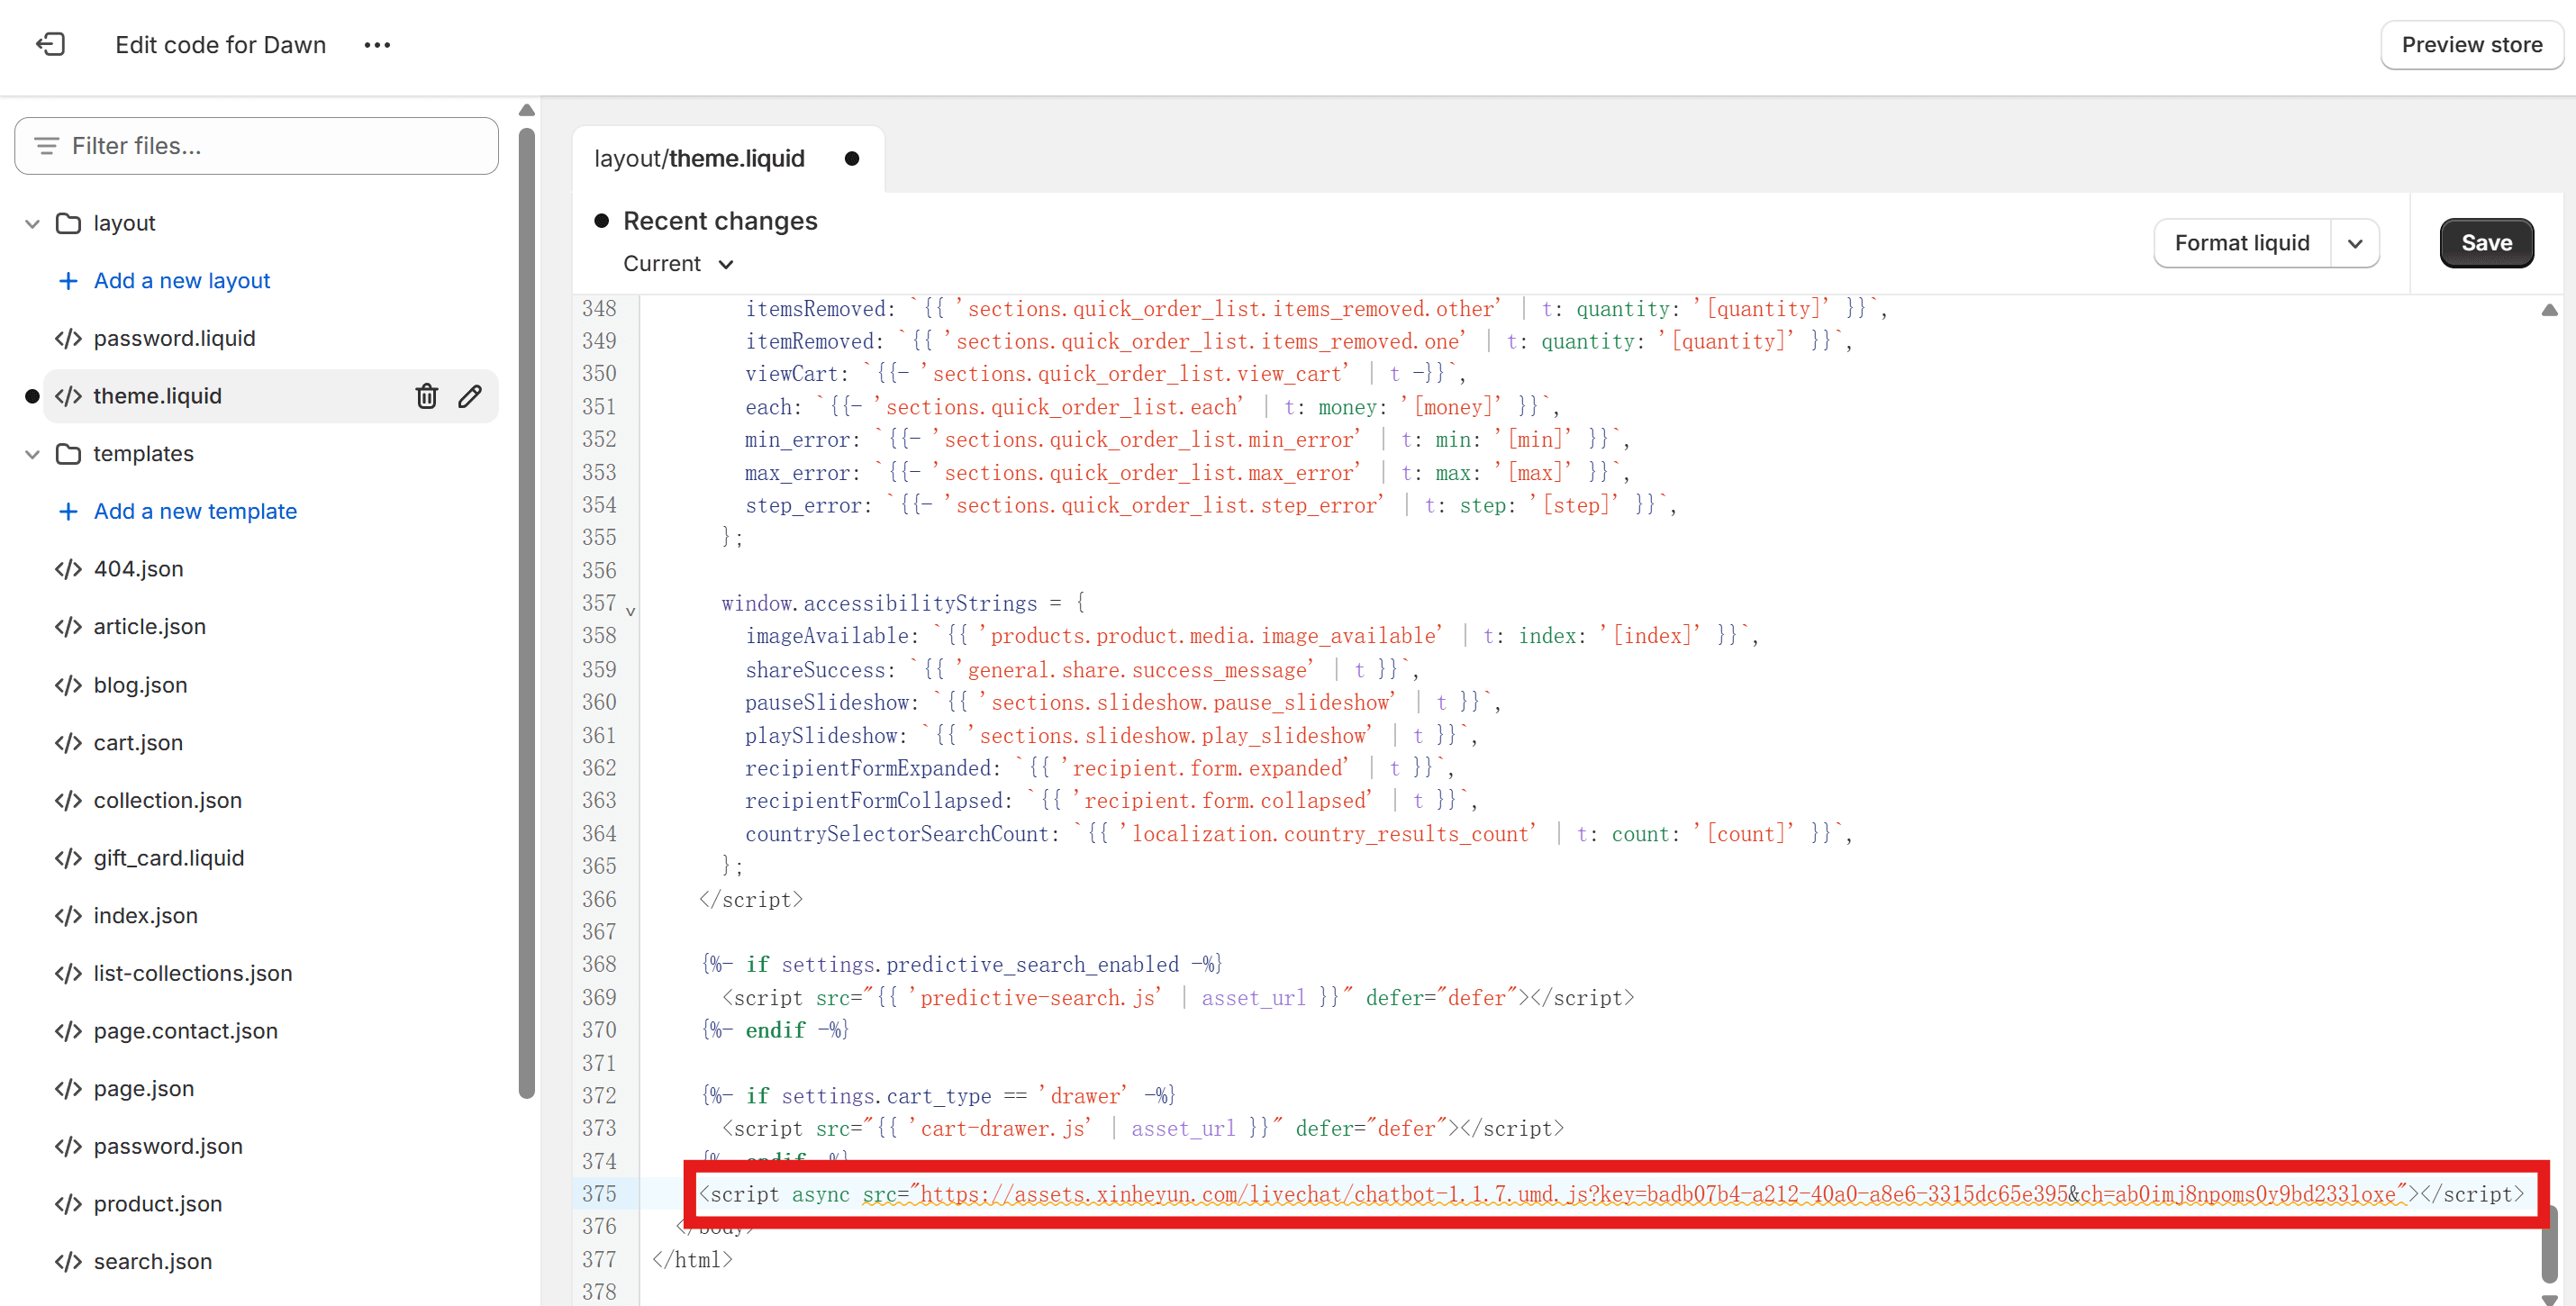
Find theme.liquid in the left file list (located in the Layout directory).

Paste the code before the </body> tag.
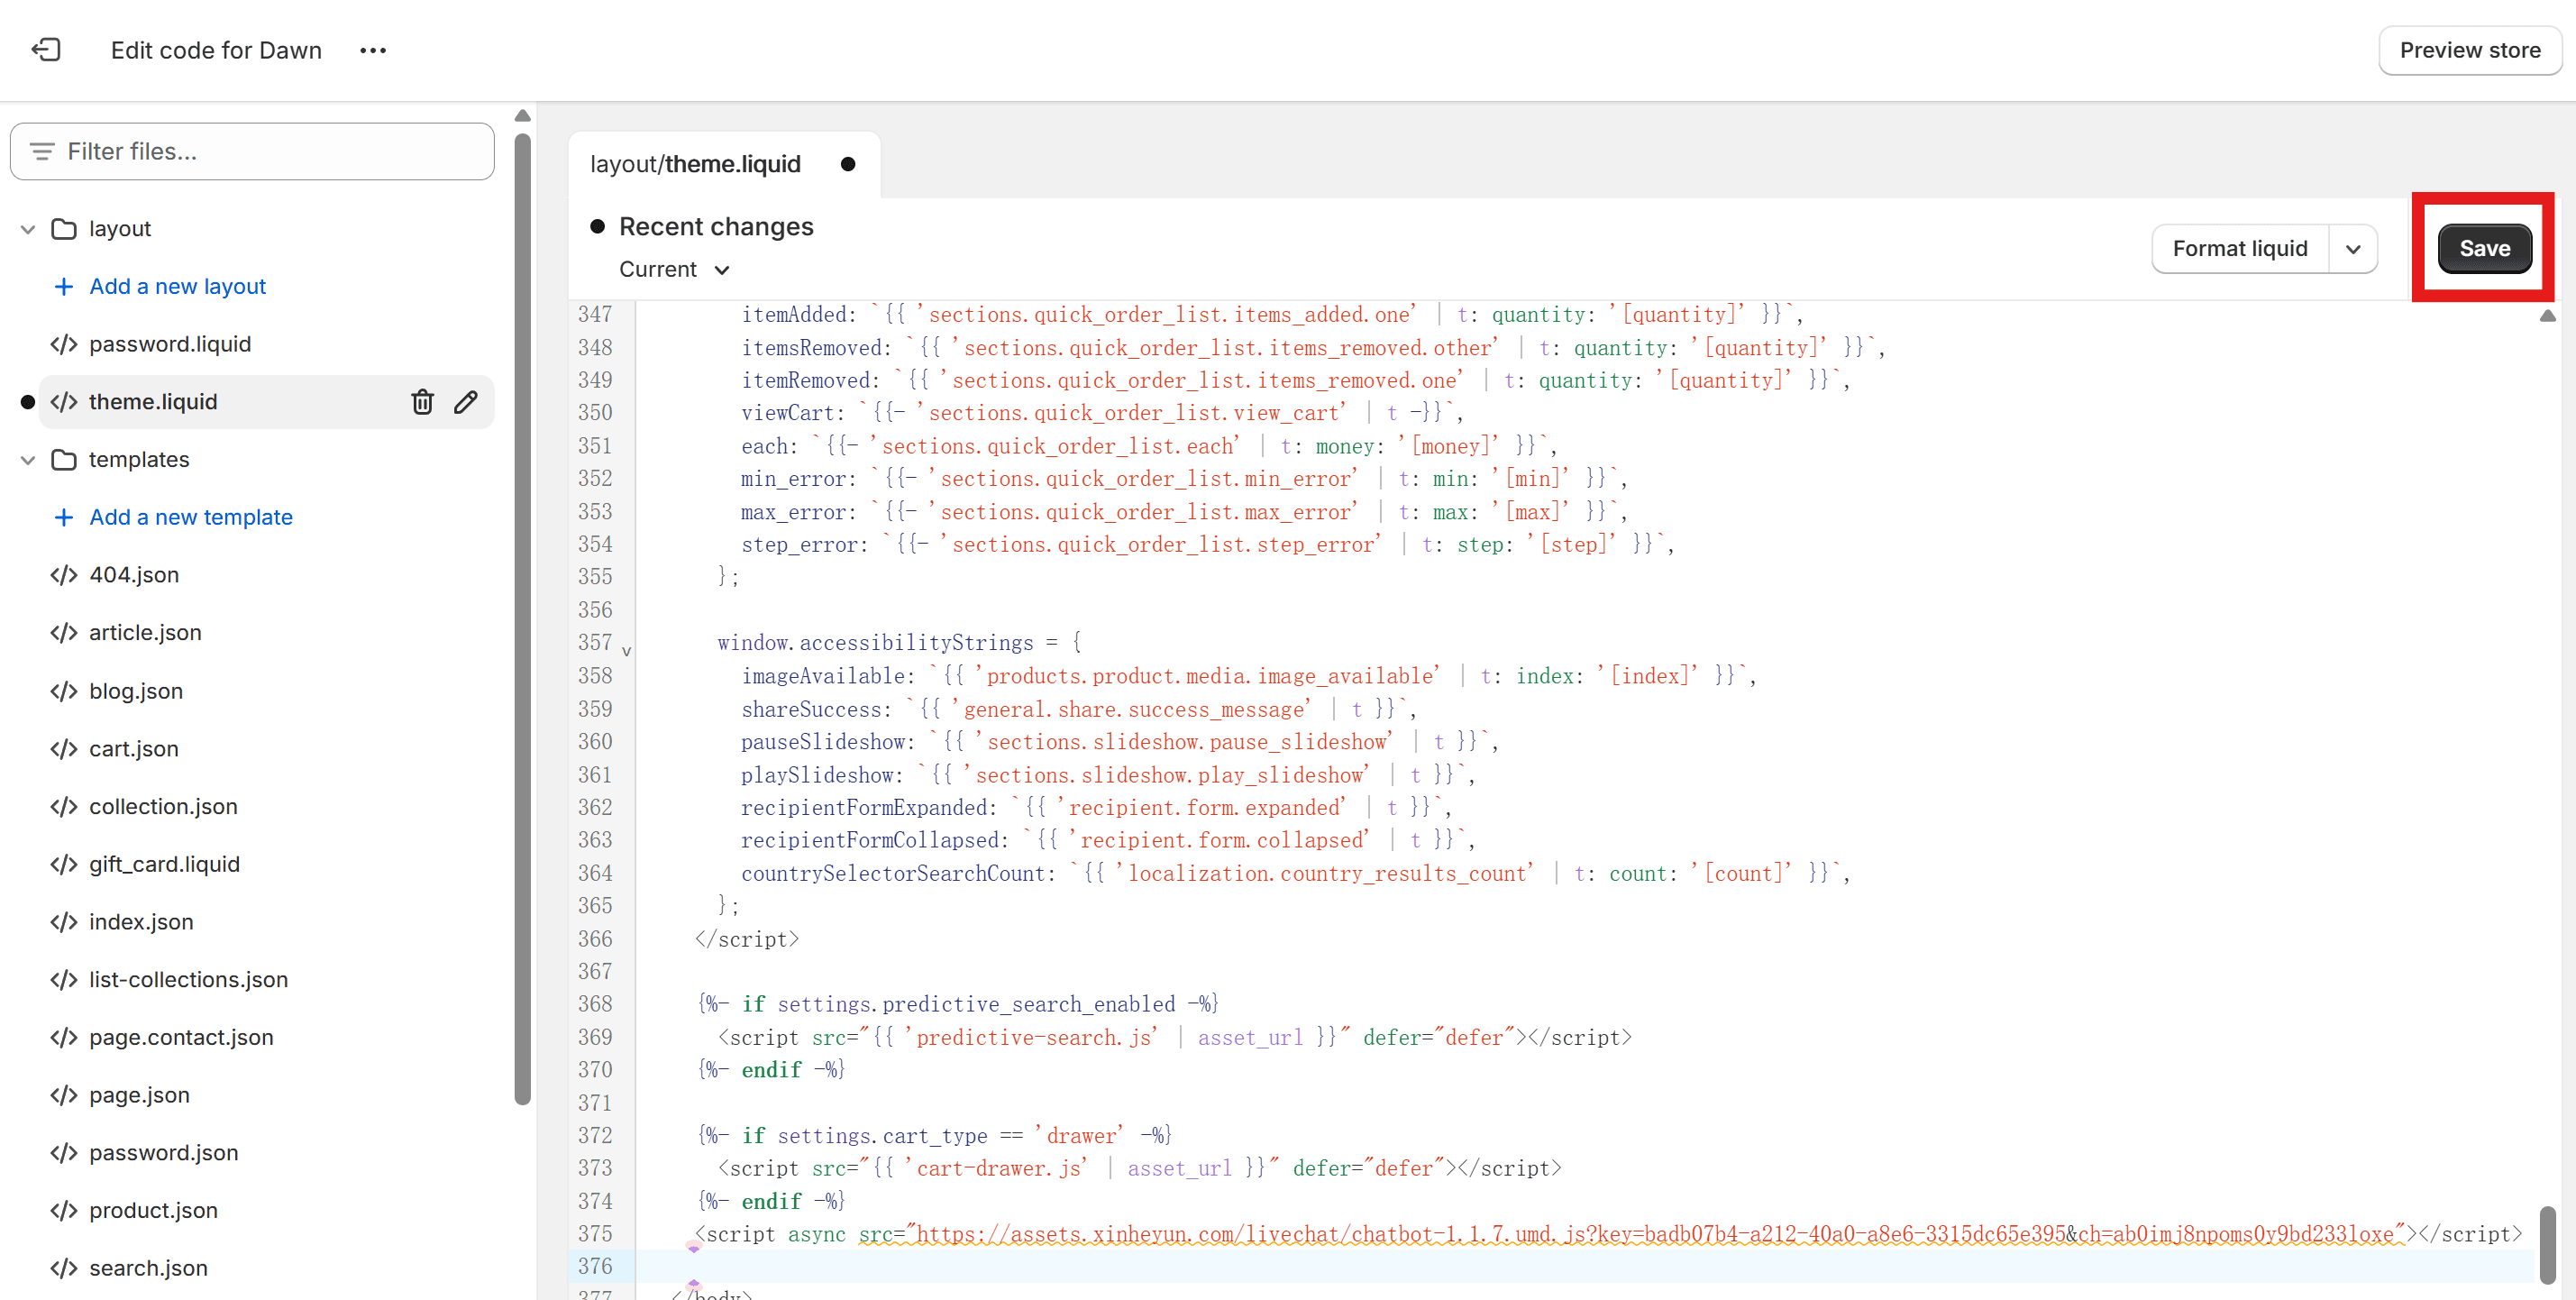
Click 【Save】, and it will take effect.
Verify the chat plugin is effective
If effective, the 3chat chat icon will appear in the bottom right corner of your website. Please click the icon to test if the interaction is successful. If you can smoothly send and receive messages, it is considered successful.
2.3 Frequently Asked Questions
Question 1: Chat window disappears after modifying the theme?
Reason: Theme update overwrites code
Solution:
Use the 「Theme Backup」 feature (Operation Path: Theme → Action → Copy)
Re-inject the code in the new theme
Question 2: Checkout page does not display the button?
Check if the code is injected into the 「Global Layout」 (not a specific template)
Temporarily test by disabling 「Checkout Protection」 type plugins (like Growave/Segment)
2.4 Further Support
If you need assistance, please contact:
📧 3Chat Customer Support: contact@3Chatai.com
📞 Shopify Technical Support: Go to the Help Center within Shopify to contact Shopify customer service
2.5 Conclusion
✅ Congratulations! You have successfully integrated 3Chat intelligent customer service into Shopify!
Now, your customers can interact directly with 3Chat through your Shopify website, enhancing customer service efficiency!
3. WordPress
3.1 Preparations Before Installation
Before you begin, please ensure:
✅ You have activated and logged into the Business version of WordPress / built a mirror WordPress through the server
✅ Ensure one WordPress is only connected to one 3Chat space
3.2 Steps to Operate
Get the 3Chat installation code
Log into the 3Chat backend, and in the left navigation bar, click 【Channels】→ 【Instant Chat】→ 【Custom Official Website Installation】
Click Copy Code Snippet
Enter the WordPress code editor and import the 3Chat code
Log into your cloud server dashboard, access the WordPress mirror website (if you are directly using the WordPress Business version, you can skip this step)
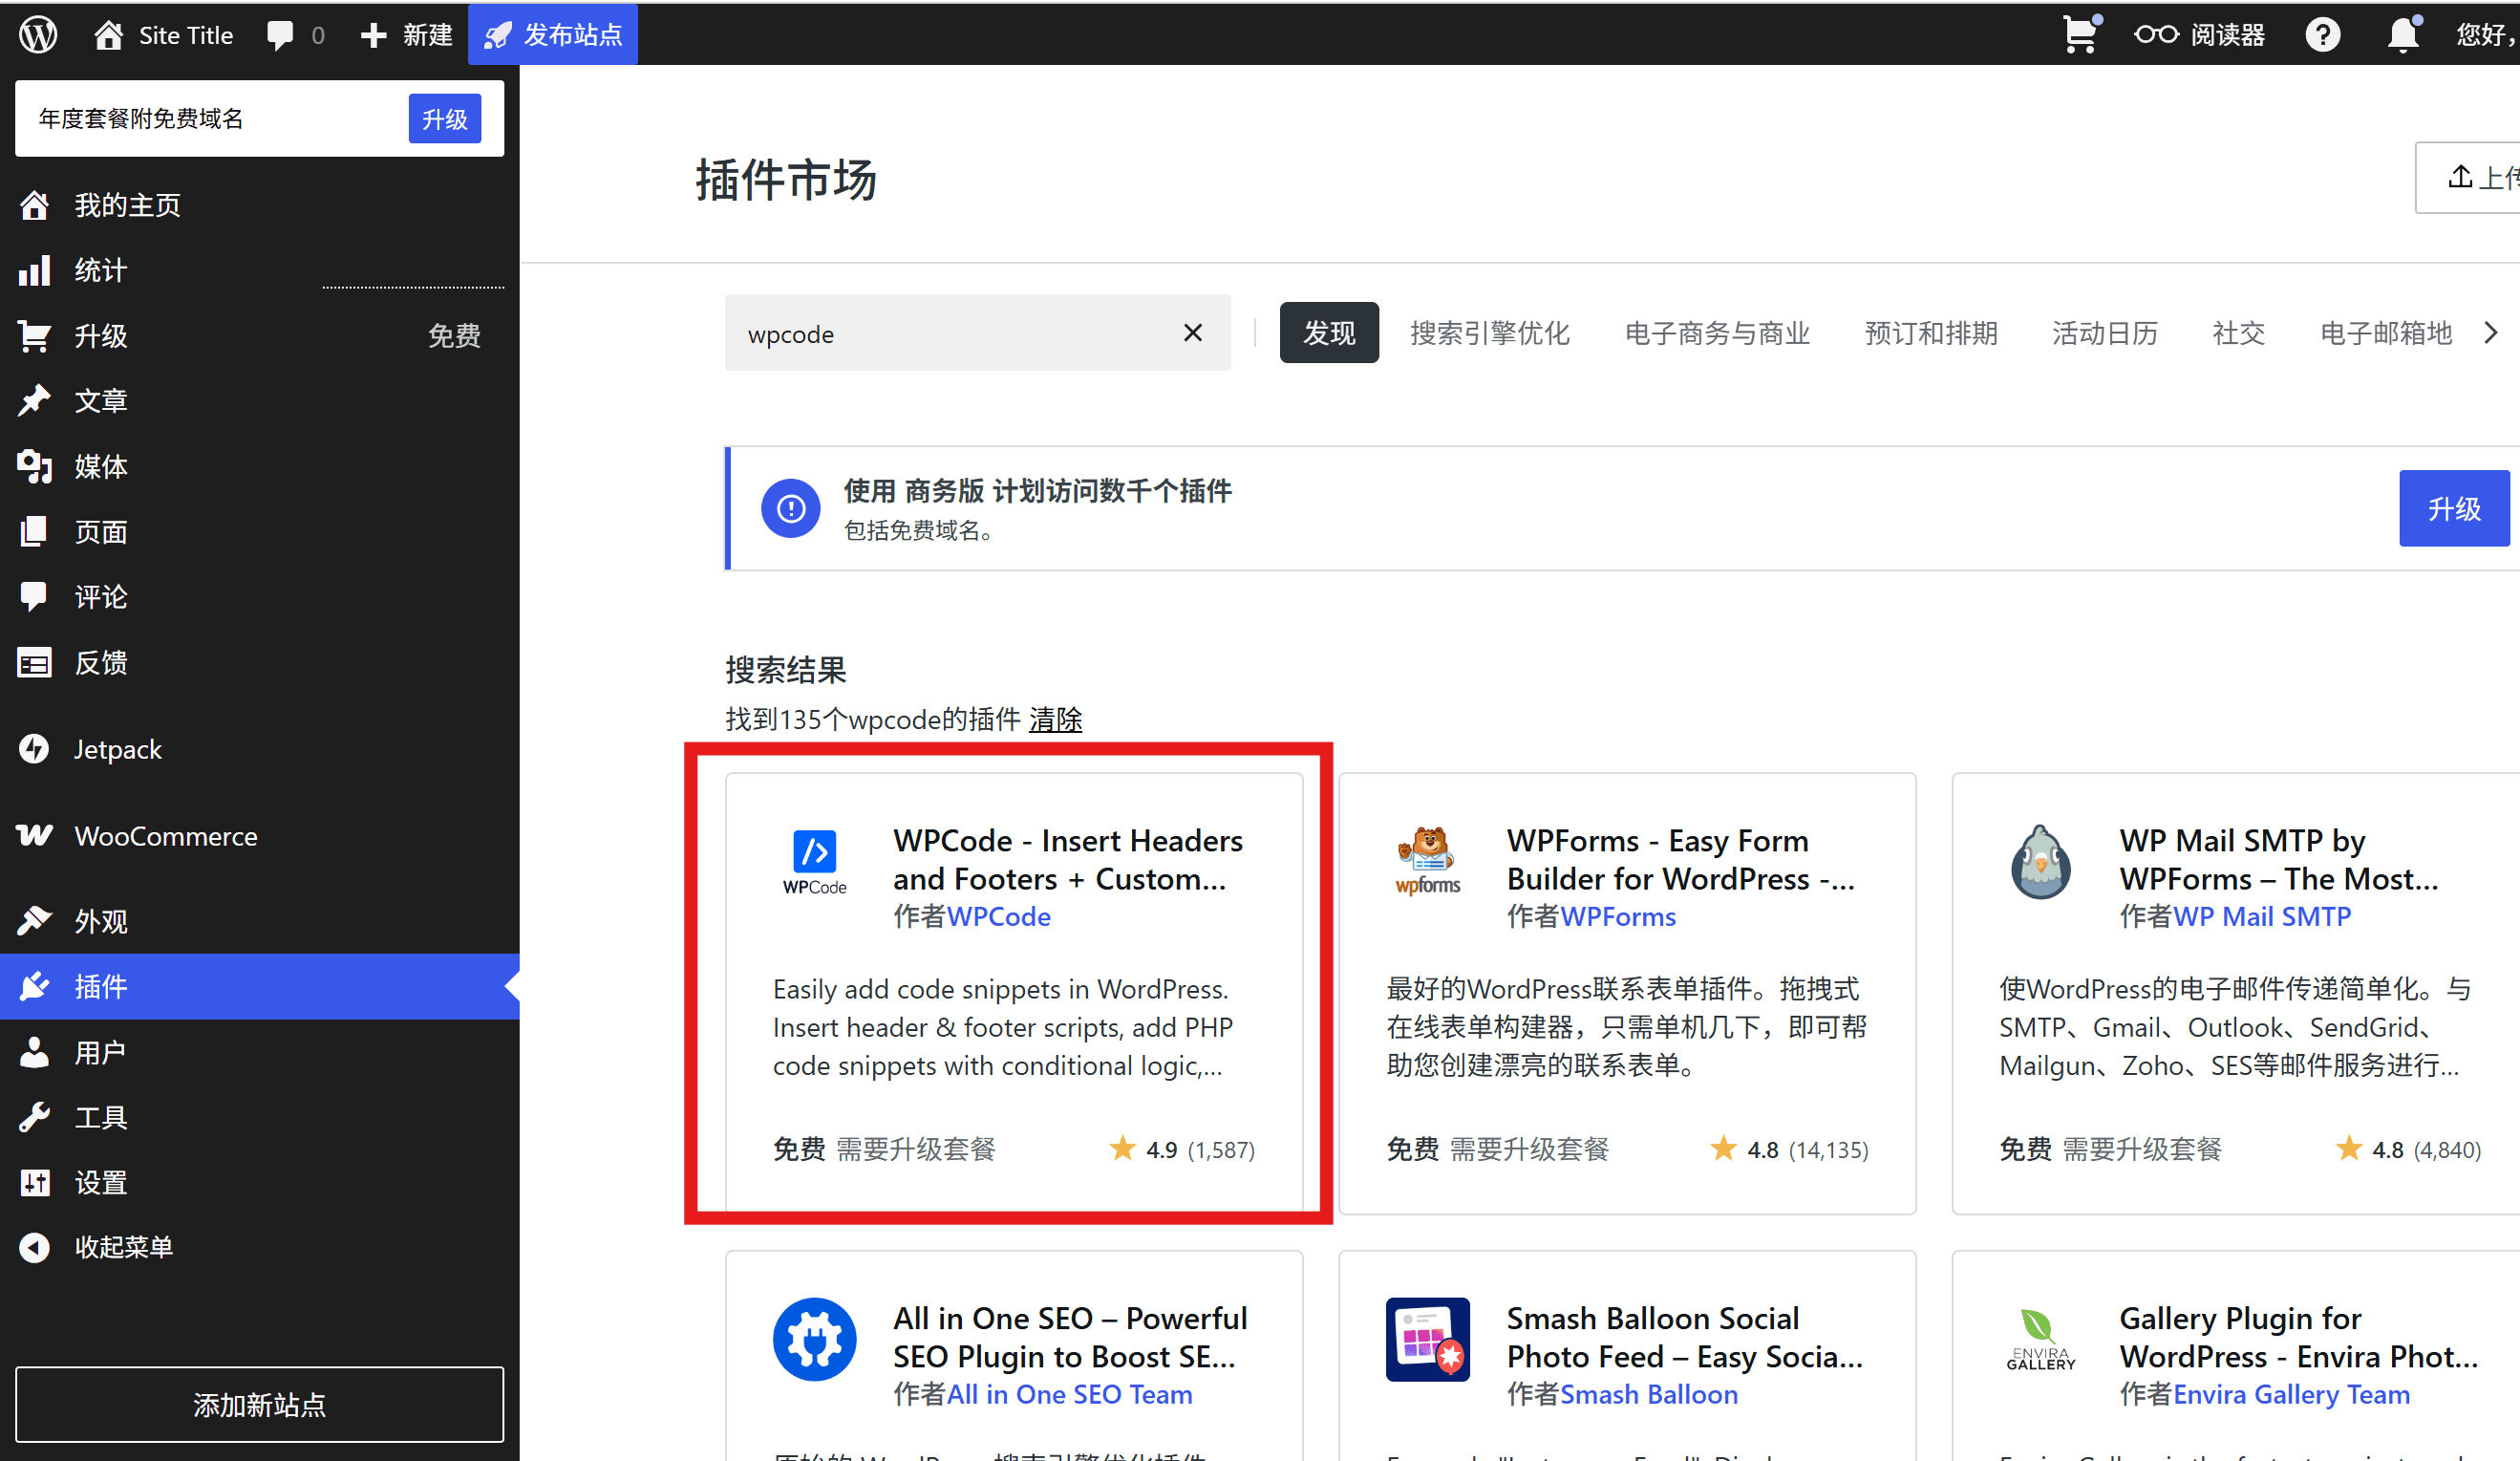
Enter the WordPress dashboard, in the left menu, select 【Plugins】

On the 【Plugins】 page, enter “wpcode” in the search box, find the WPCode plugin, and click on that option
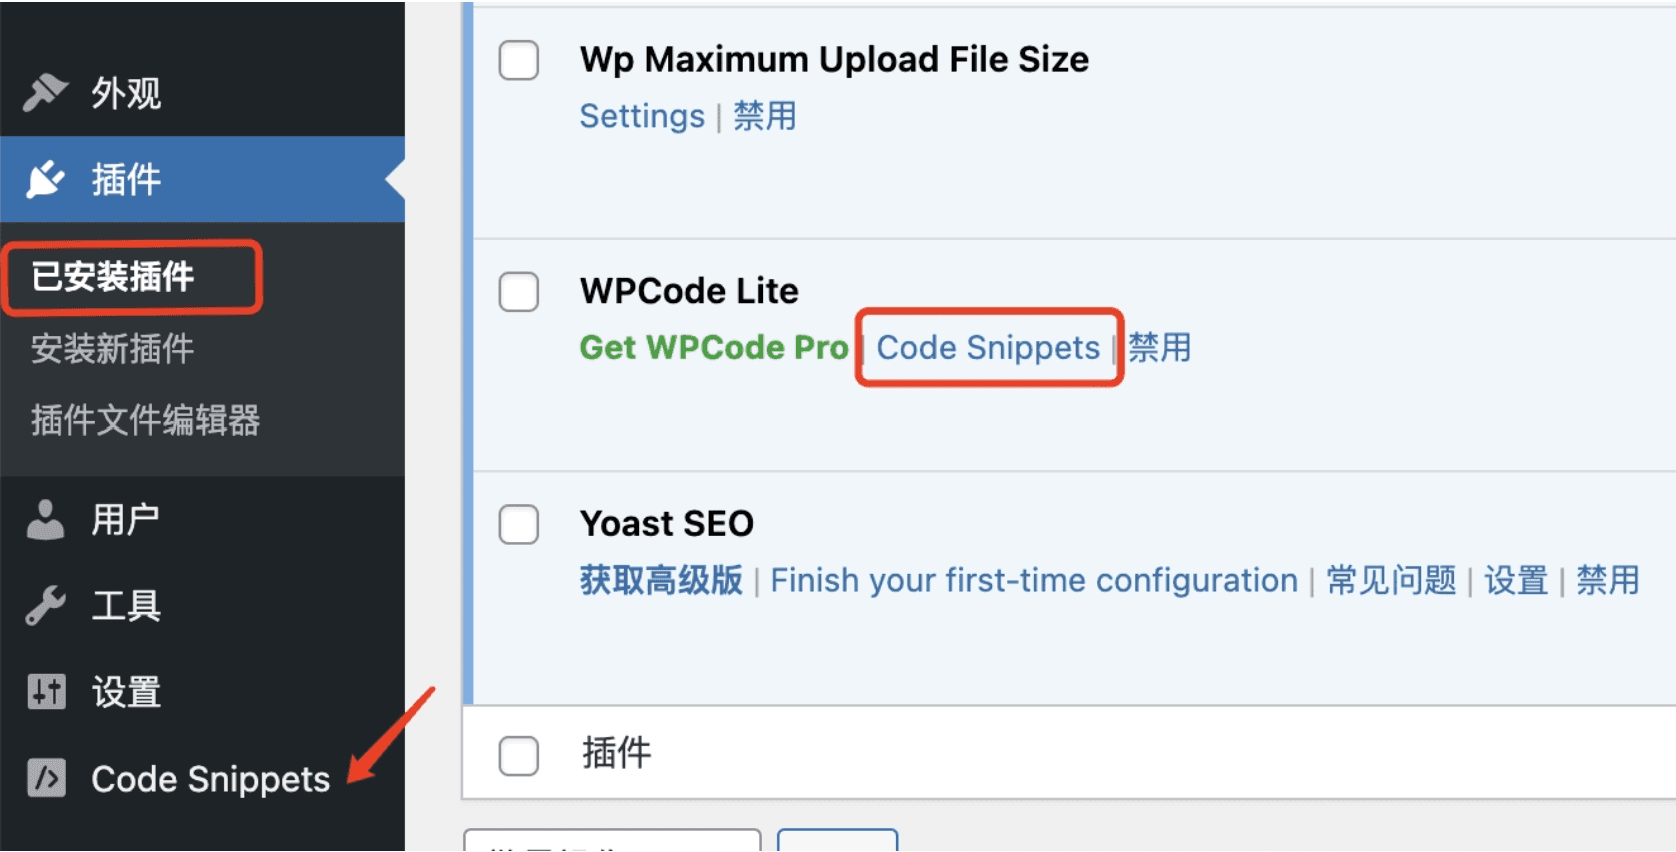
After enabling the WPCode plugin, click the **【Plugins】** in the navigation bar again, find WPCode in the **Installed Plugins** list, and click **【Code Snippets】** to enter the configuration interface; you can also directly find the plugin configuration entry in the left menu, choose **【Code Snippets】** to enter the configuration interface
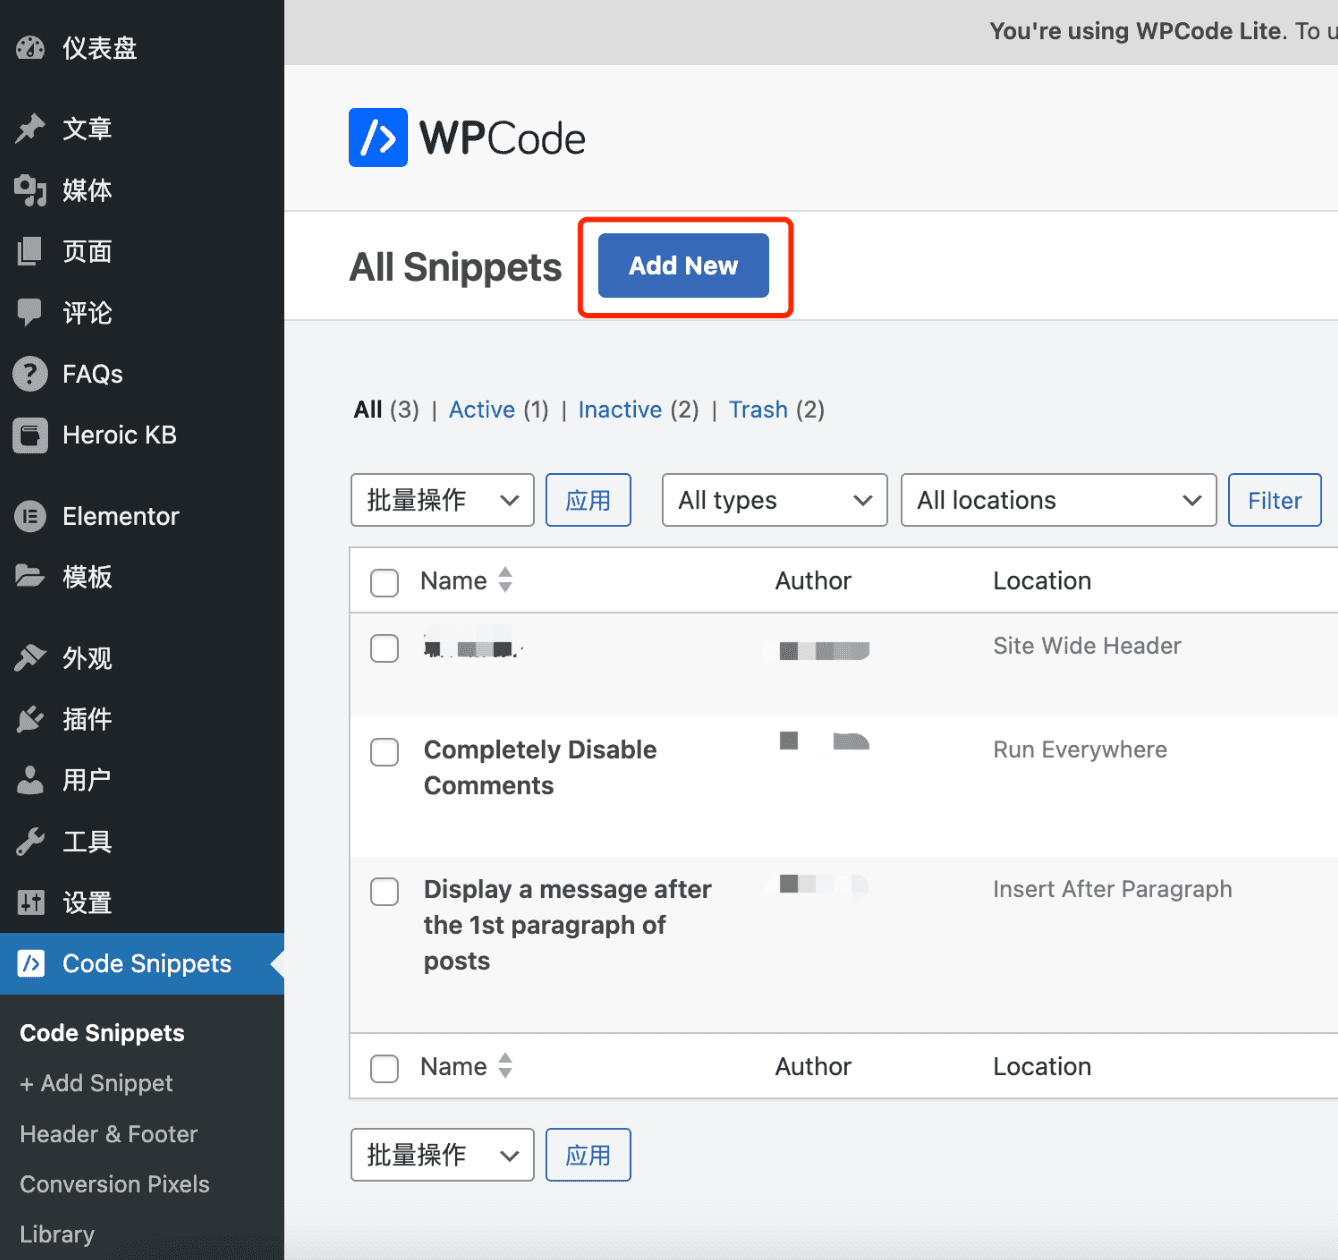
In the WPCode configuration interface, click the 【Add New】 button
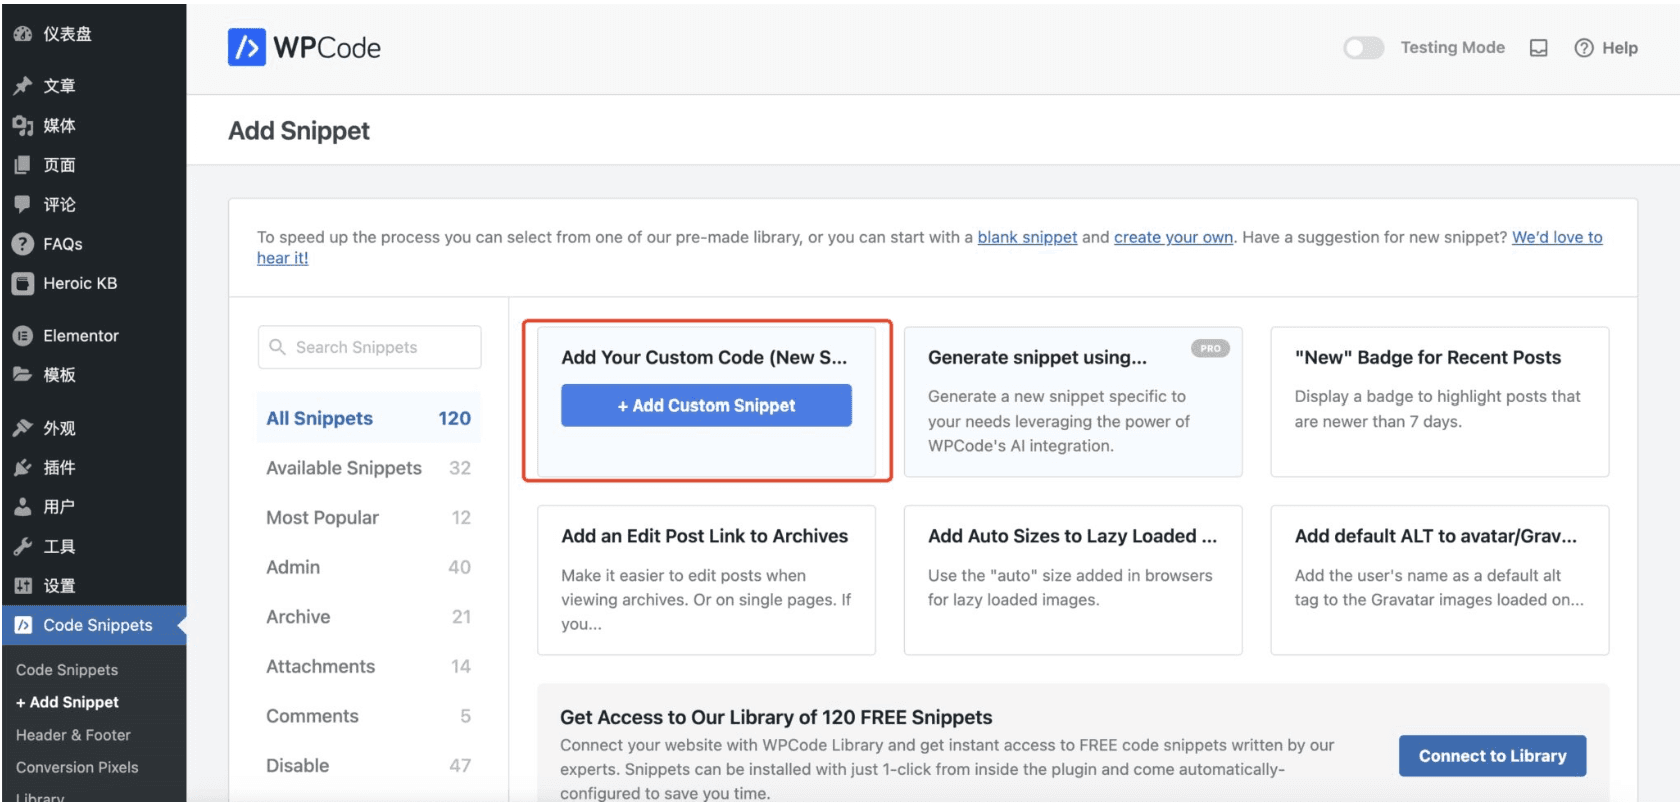
On the add code page, click 【+Add Custom Snippet】
Paste the 3Chat installation code copied in the first step directly into the code configuration page, with the code type defaulting to: HTML Snippet, and edit the code name for easier viewing in the configuration interface
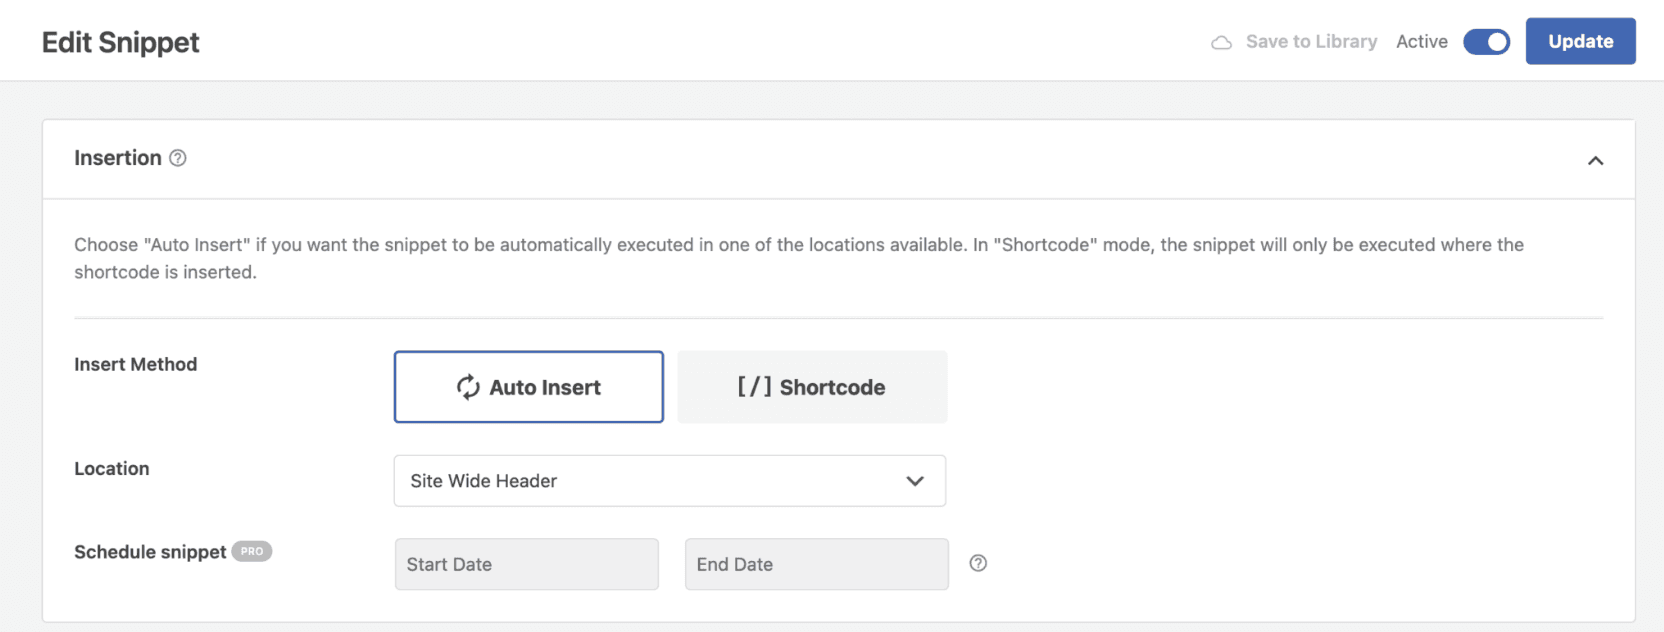
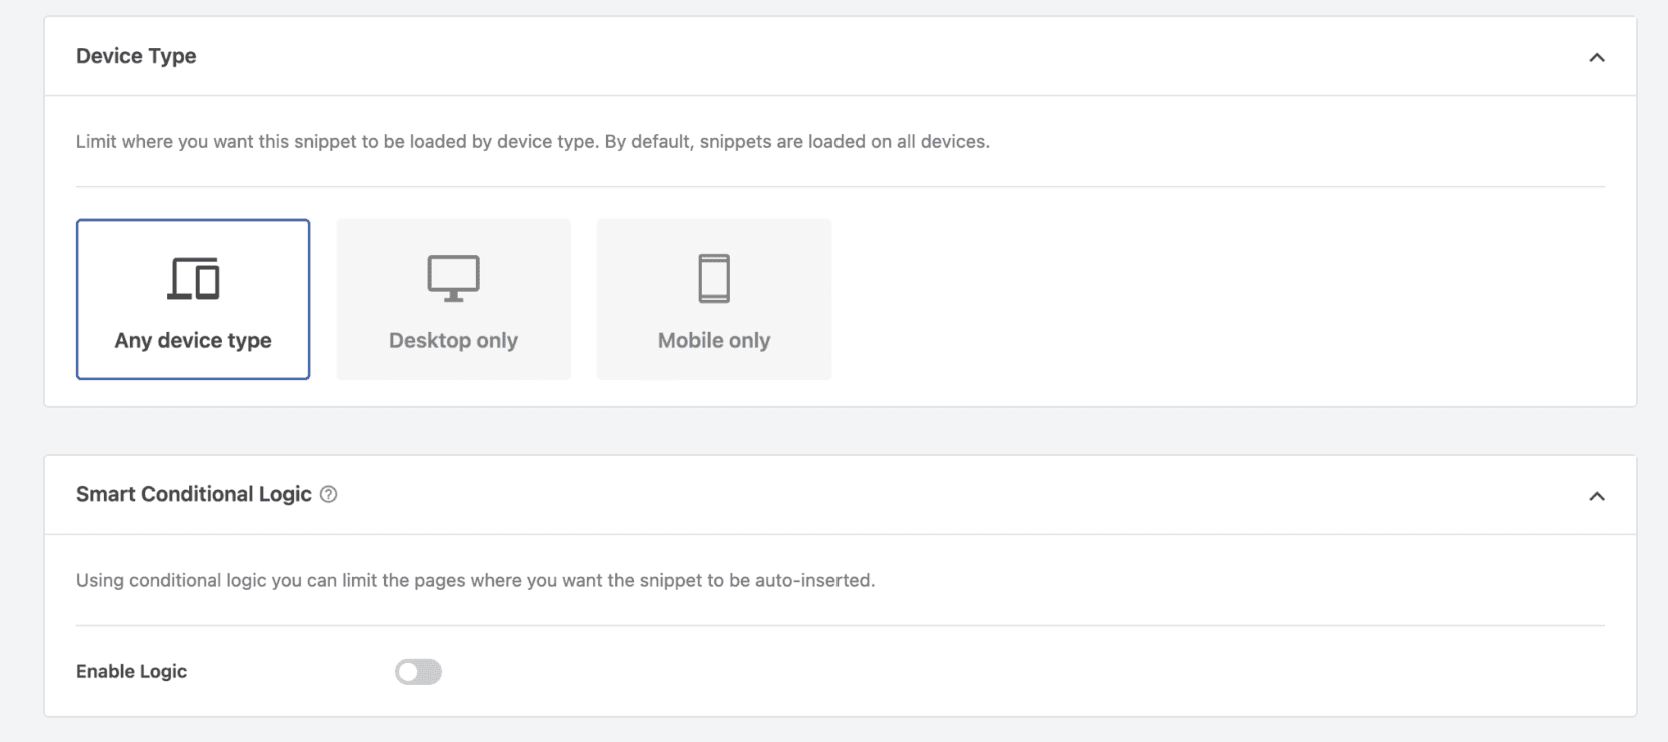
The subsequent configuration options can run with the default settings; you can modify as needed
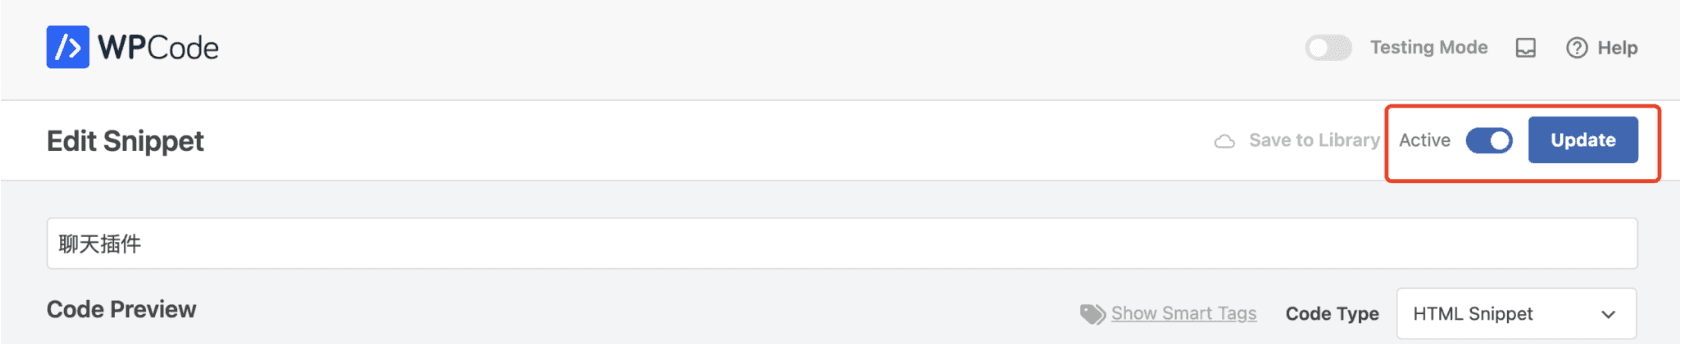
Save and Enable the Code
After configuration is complete, click the **【Update】** button in the upper right corner to save the custom code configuration, and also turn on the **Active** button to ensure the plugin code is in the enabled state
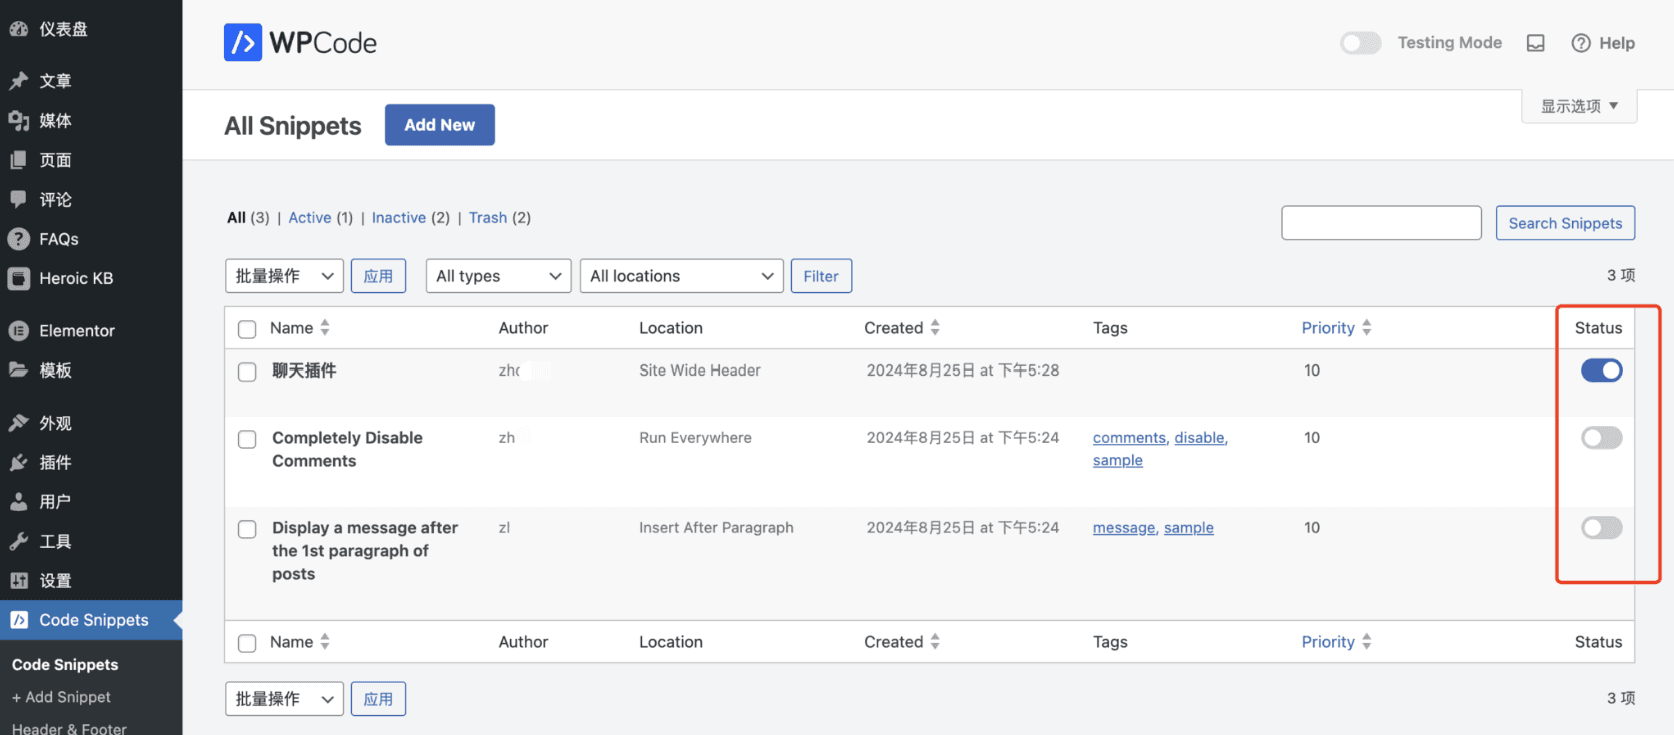
Return to the list of all codes, you can see all added code information and whether it has been successfully enabled
Verify the chat plugin is effective
If effective, the 3chat chat icon will appear in the bottom right corner of your website. Please click the icon to test if the interaction is successful. If you can smoothly send and receive messages, it is considered successful.
3.3 Frequently Asked Questions
❓ WPCode plugin not effective after saving?
→ Force Refresh: Press Ctrl+Shift+R (Windows) or Cmd+Shift+R (Mac)
→ Conflict Detection:
Disable other code injection plugins (like Header Footer Code Manager)
Test by switching to the default theme (Twenty series)
❓ Multilingual website only partially effective?
→ Enable the 「Run everywhere」 option in WPCode
→ Create independent code snippets for different languages (language conditions need to be configured)
3.4 Further Support
If you need assistance, please contact:
📧 3Chat Customer Support: 3Chat@xinheyun.com
3.5 Conclusion
✅ Congratulations! You have successfully integrated 3Chat intelligent customer service into your WordPress-built website!
Now, your customers can interact directly with 3Chat through your WordPress-built website, enhancing customer service efficiency!
4. Framer
4.1 Preparations Before Installation
Before you begin, please ensure:
✅ You have activated and logged into Framer
✅ Ensure one Framer is only connected to one 3Chat space
4.2 Steps to Operate
Get the 3Chat installation code
Log into the 3Chat backend, and in the left navigation bar, click 【Channels】→ 【Instant Chat】→ 【Custom Official Website Installation】
Click Copy Code Snippet
Enter the Framer code editor and import the 3Chat code
Go to the Framer editing page
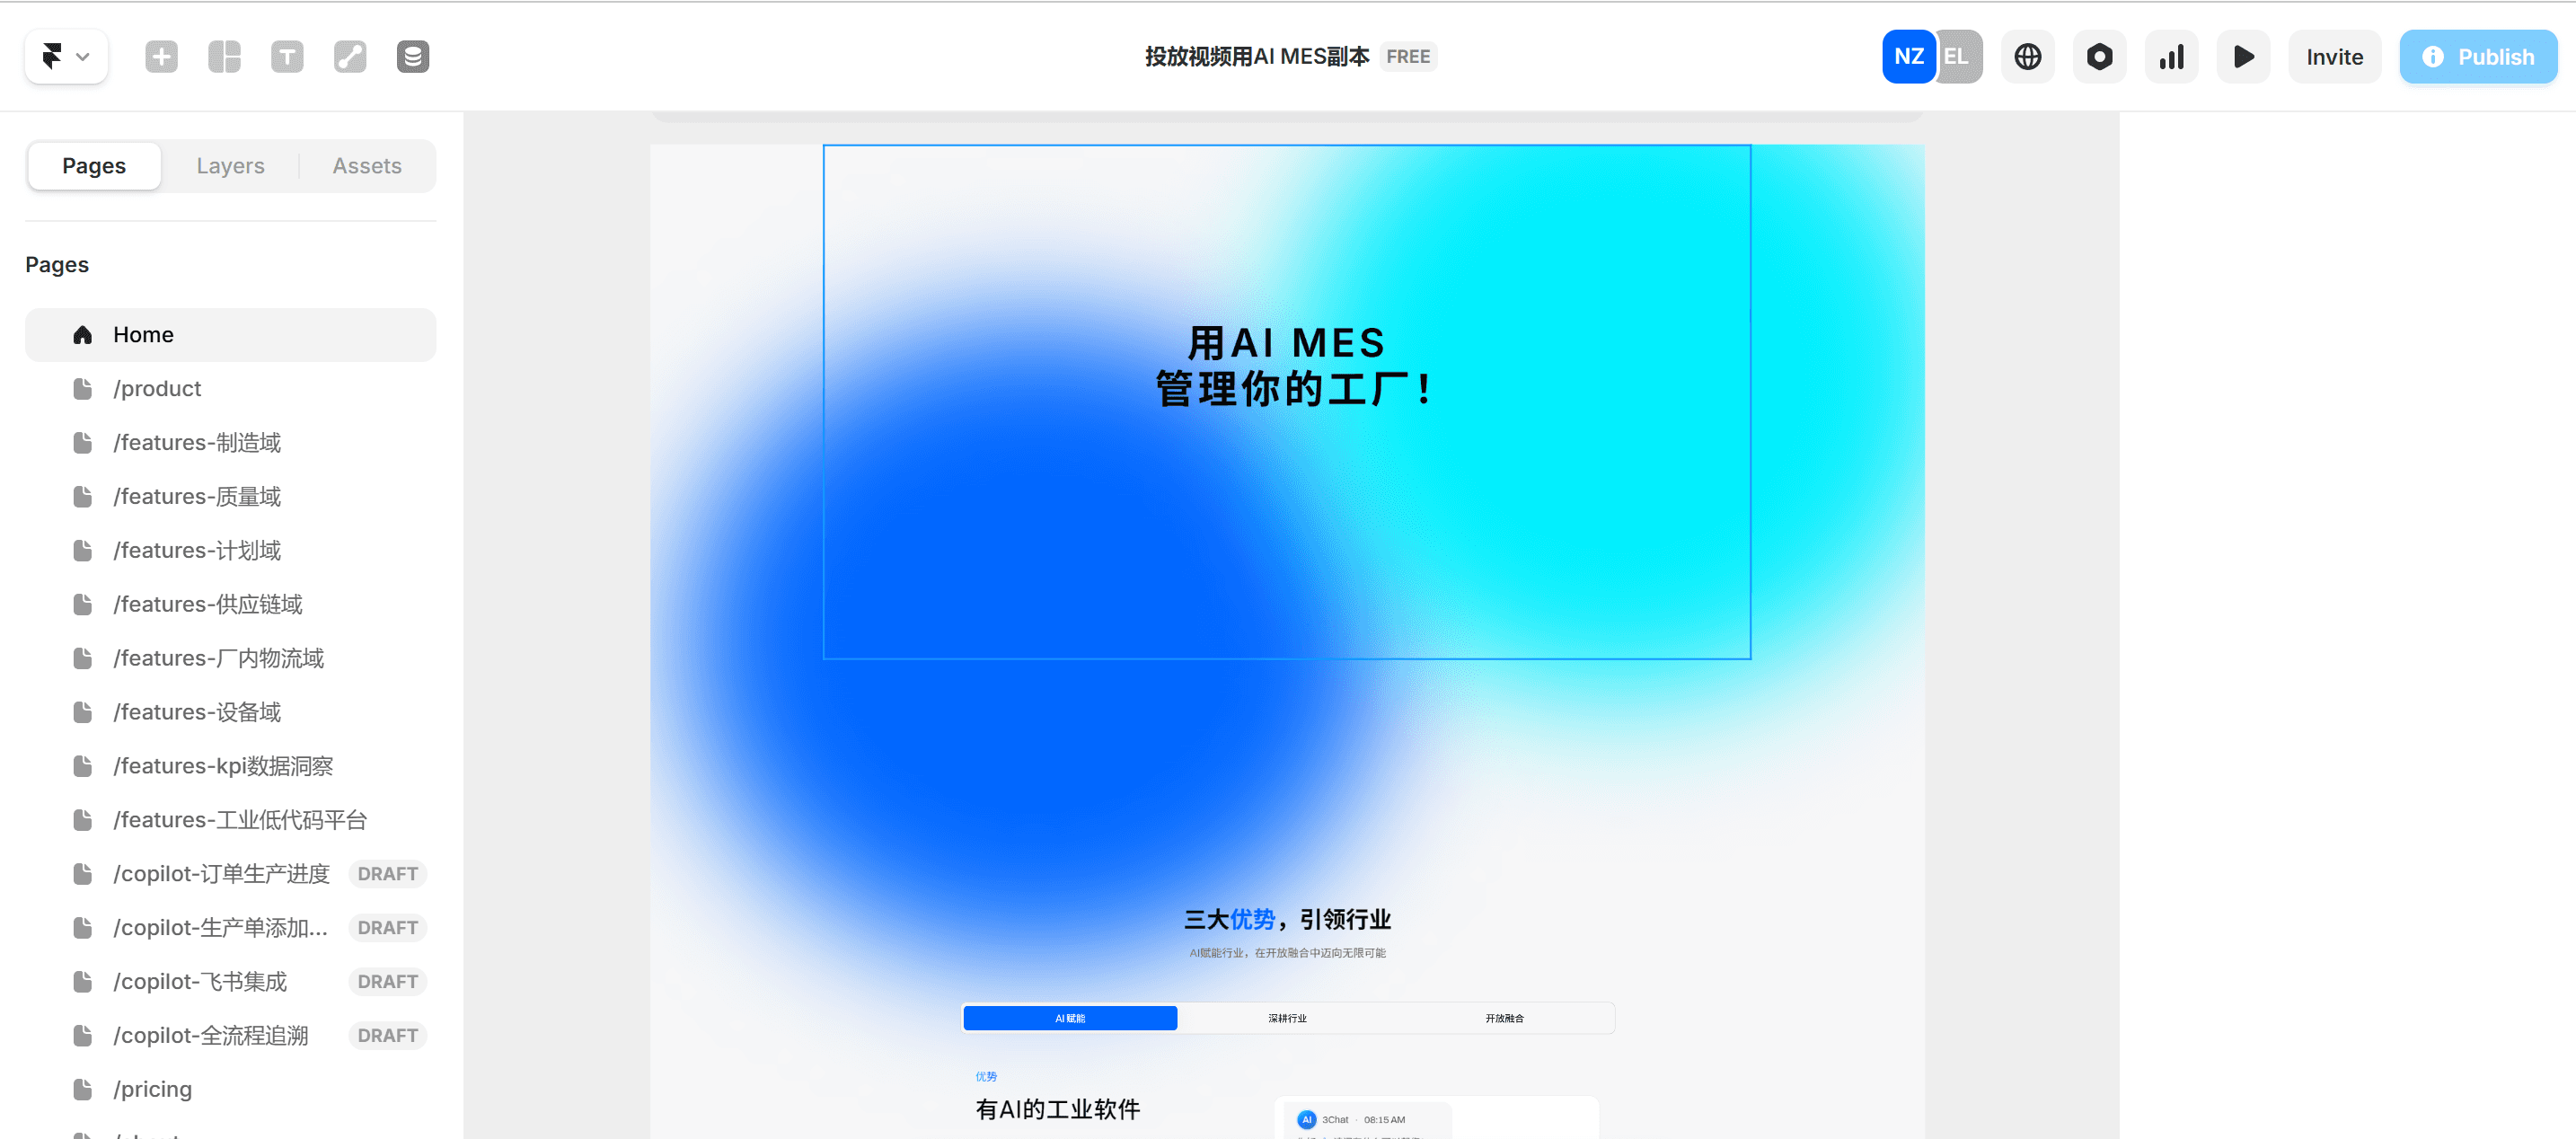
Click the **Edit Icon** of Home, and click 【Settings】

In the settings interface, click 【General Settings】 on the left

At the bottom of this page, find the 【Custom Code】 section, and paste the 3Chat chat tool code copied in the first step into the 【End of <body> tag】 section

Click 【Save】, and it will take effect.
Verify the chat plugin is effective
If effective, the 3chat chat icon will appear in the bottom right corner of your website. Please click the icon to test if the interaction is successful. If you can smoothly send and receive messages, it is considered successful.
4.3 Frequently Asked Questions
❓ Page style is chaotic after embedding the code?
→ Reason: CSS selector conflict
→ Solution:
Add a container outside the 3Chat code
<div id="3chat-container">...</div>Custom CSS isolation:
css #3chat-container * { all: unset; /* Reset inherited styles */ }
❓ Mobile button has no response when clicked?
→ Disable the 「Interactive Preview」 mode in Framer (test with the official release)
→ Check if 「Gesture Conflict」 type animation components are enabled
4.4 Further Support
If you need assistance, please contact:
📧 3Chat Customer Support: 3Chat@xinheyun.com
📞 Framer Technical Support: Within Framer, go to the Help Center for various types of help and contact Framer customer service
4.5 Conclusion
✅ Congratulations! You have successfully integrated 3Chat intelligent customer service into your Framer-built website!
Now, your customers can interact directly with 3Chat through your Framer-built website, enhancing customer service efficiency!
Address
Building A6, 10th Floor, No. 1528, Gumei Road, Xuhui District
Headquarters · Shanghai
Branches · Singapore · Guangzhou · Chengdu · Hangzhou · Hefei · Nanjing · Shijiazhuang
Telephone